Photobucket Photobucket Photobucket Photobucket Photobucket

April 29, 2013

{local events} Junk in the Trunk Vintage Market

Good Morning friends. I had to share with you my adventures this past weekend. My friend Destiny and I hit up The Junk in the Trunk Vintage Market here in Phoenix. If you live locally you must hit up this event next time. They will run the market again in November. Visit their website here for more info.

Lots of old, vintage chippy goodness everywhere you looked. This was my first time to this market and I can't wait to go again this Fall. Seriously if you're local and have the chance to go please do! There was so much to look at, endless finds. I could have easily bought so much. And the thing that I love most about stuff like this is you're buying pieces that no one else is going to have in their home.

totally should have gotten a wooden arrow. 

 via @aplaceforus on instagram 
{my junk finds included}
a cute table and chairs set
a vintage globe
a wine bottle crate
and a sign with the lyrics from The Potter's Hand

love all my finds. 


the scene about 10 minutes after I got home with that table. 

totally worth it. 

April 24, 2013

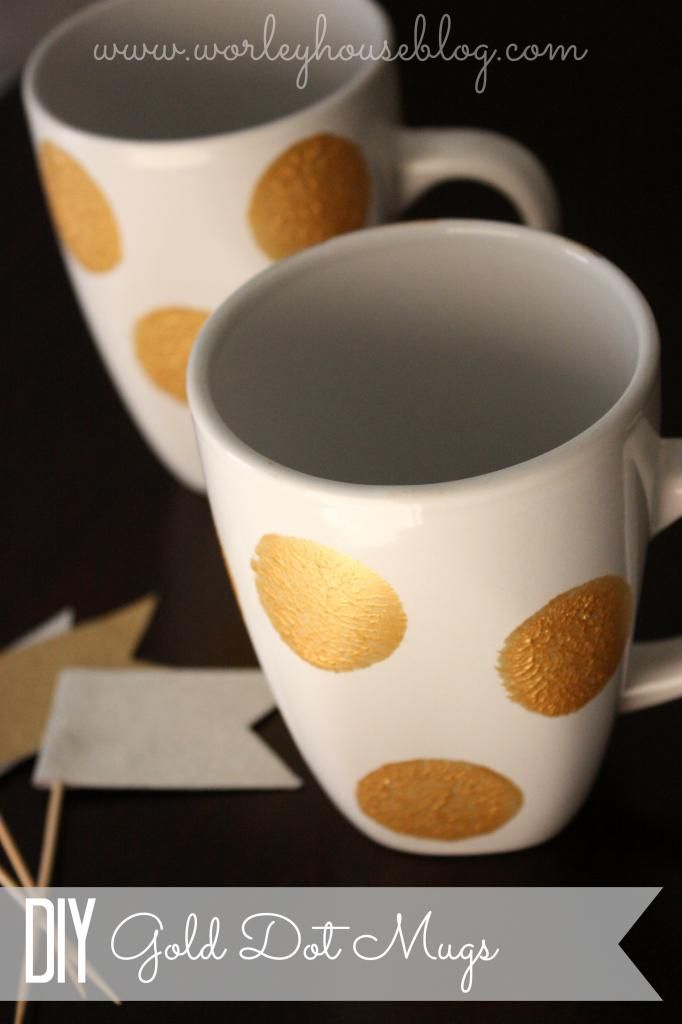
{DIY} Gold Dot Coffee Mugs with #MarthaStewartCrafts #MothersDay

 photo DIYGoldDotMugs_zps47222a51.jpg

Mother's Day is fast approaching us, it's a great time to make some lovely DIY gifts for your special Mom. My mother lives out of state, and every time she visits it's so special. I love to soak up those moments with her sharing coffee together in my kitchen. 

I wanted to make some special mugs for us to enjoy when she comes to visit us next week. 

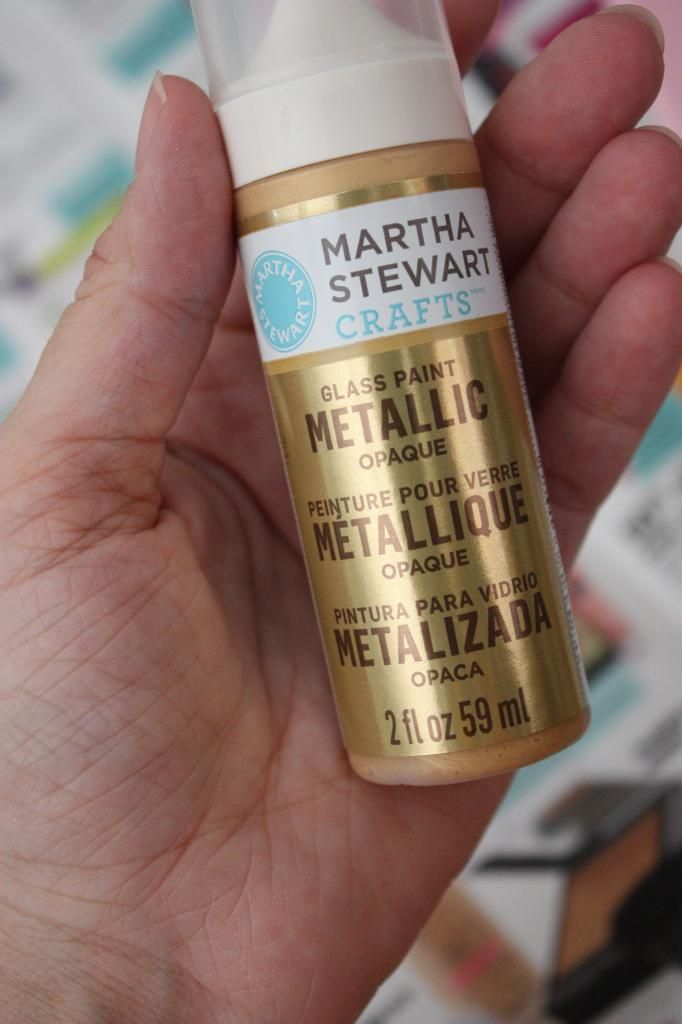
 photo IMG_3993_zps9b2eadeb.jpg

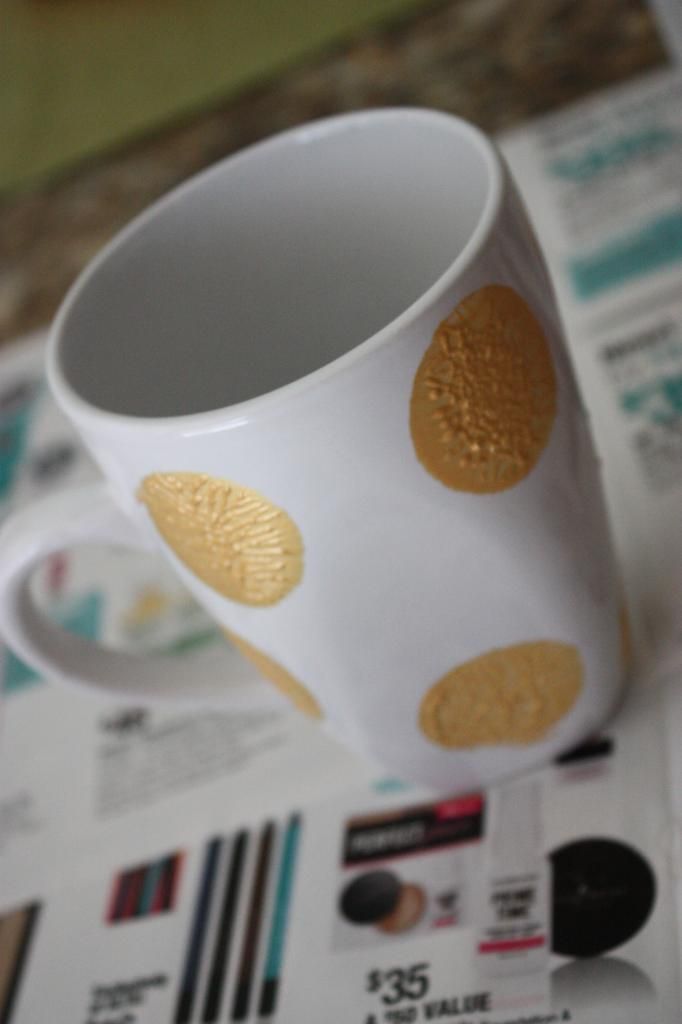
I used these Martha Stewart Crafts glass paint in metallic gold for this project. I'm really on a gold kick lately, I just love it. These mugs are totally Kate Spade inspired. 

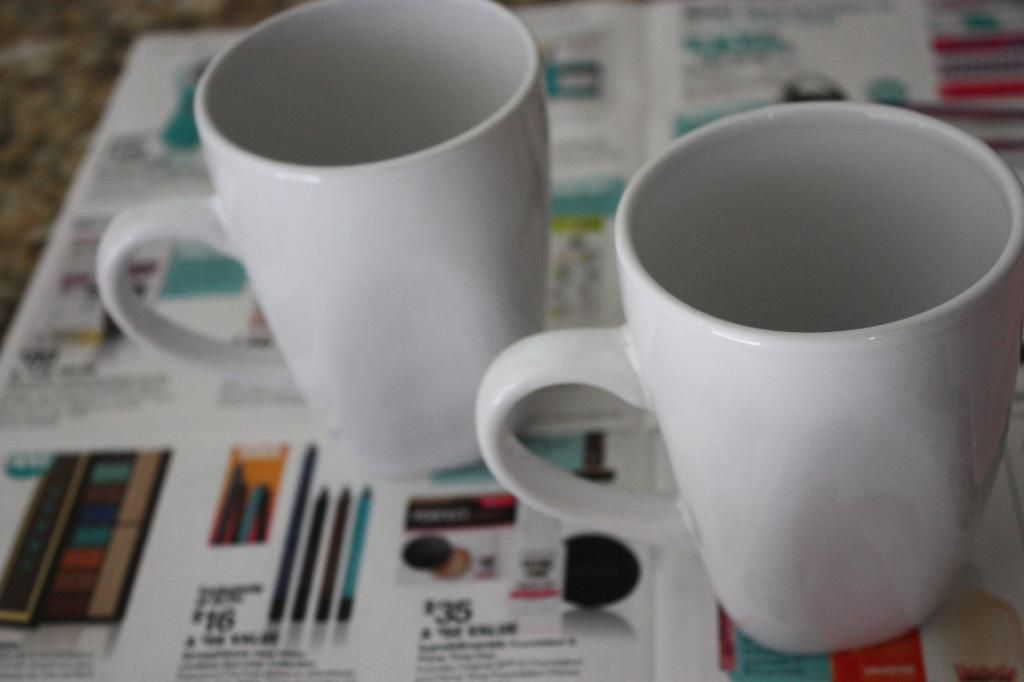
 photo IMG_3994_zpsba421abf.jpg

I bought two plain white mugs from the Dollar Tree, cleaned them with rubbing alcohol per the instructions on the paint box. Let them dry before applying the paint. 

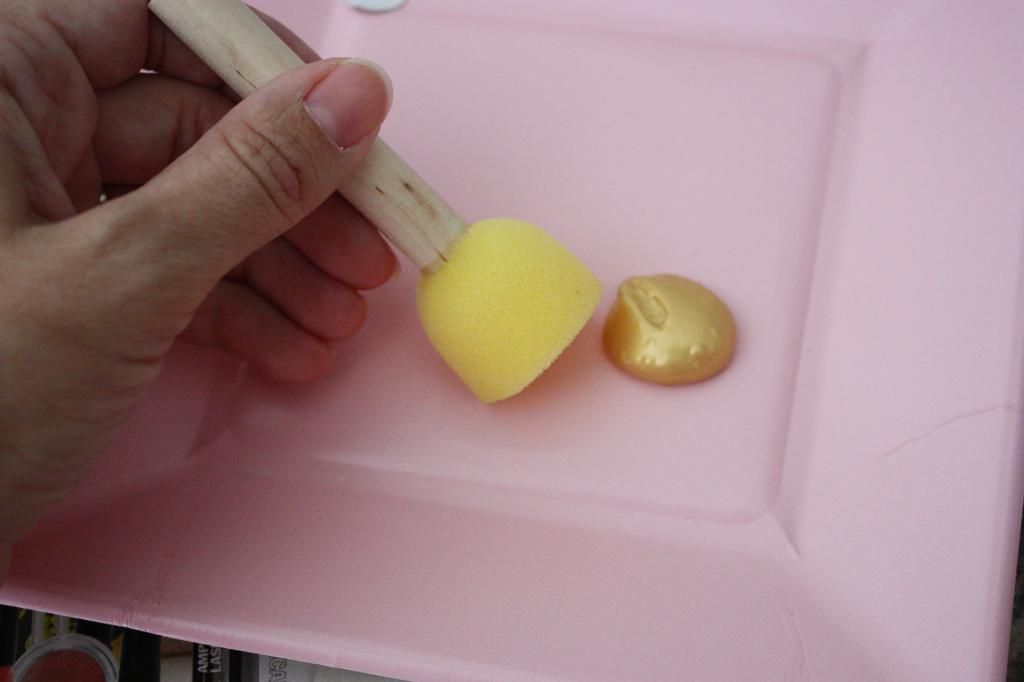
 photo IMG_3995_zpseb6354bf.jpg

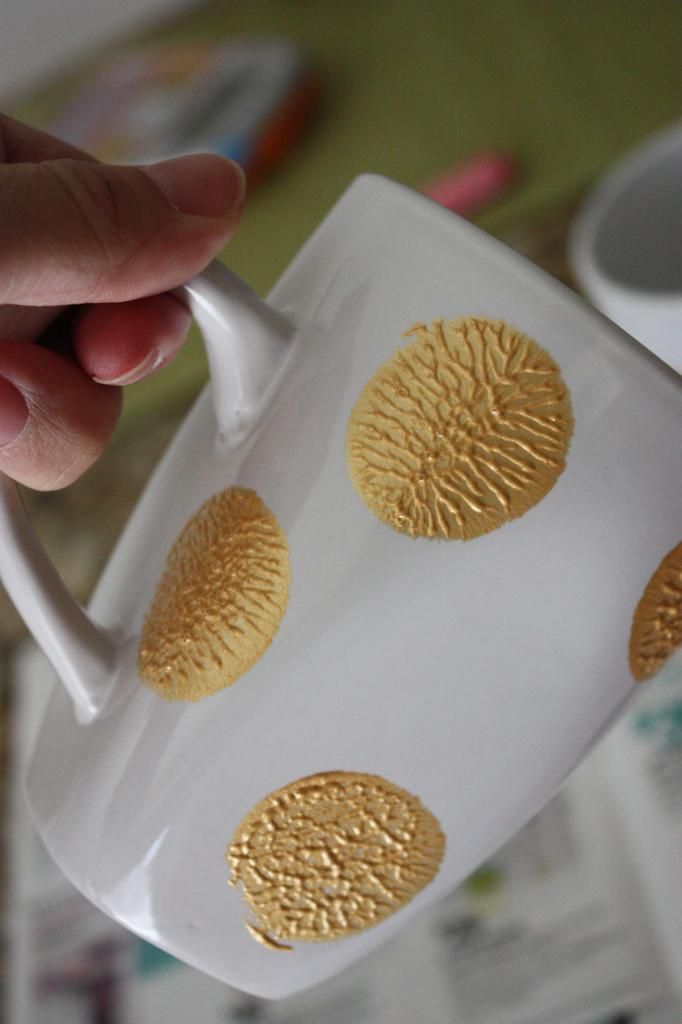
I started by putting a quarter size amount of paint on a plate, using a foam round brush (you can get these at any craft store.) I dabbed some gold dots around my mug. No pattern just randomly around the mug.

 photo IMG_3996_zps1aff06ad.jpg

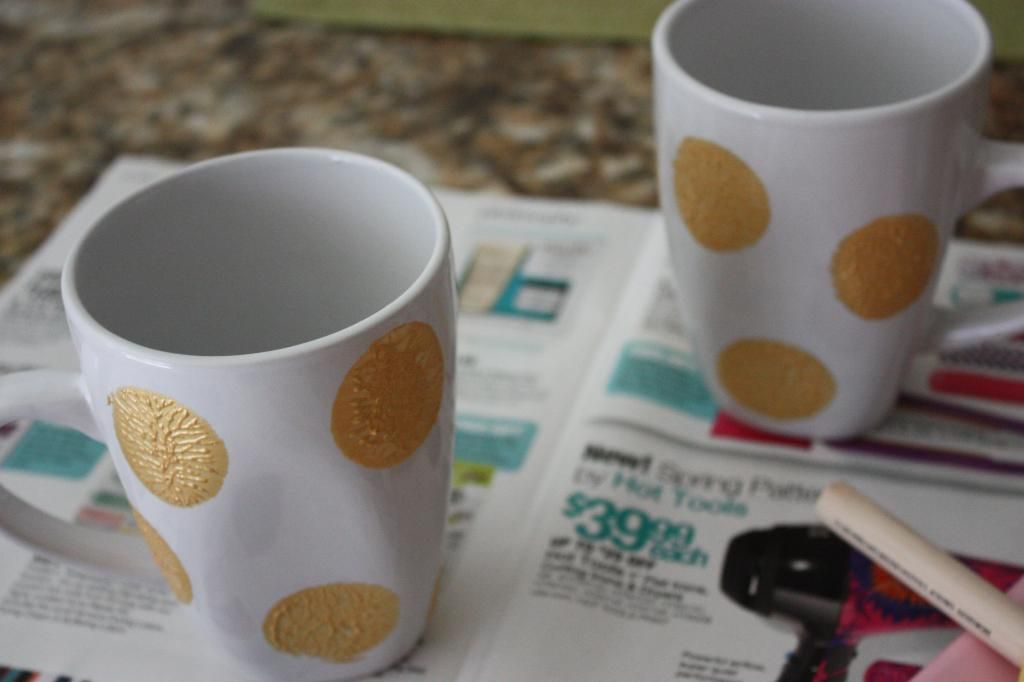
It'll look something like this once you're done. 

 photo IMG_3997_zpsac6cd6f3.jpg

Make sure you get the back side too.

 photo IMG_3998_zps8b6c856d.jpg

Then do your other one. You need a pair to have coffee with mom ;)

You can air cure these for 21 days, or cure them in the oven. I chose to do mine in the oven. Set your oven to 350 degrees and place them in the oven right away before it's fully preheated. DO NOT place these in an already hot oven or it will not cure properly. Set your timer for 30 minutes. Let them cool in the oven and wait 72 hours before using them. 

 photo IMG_4052_zps7bd6e1c3.jpg

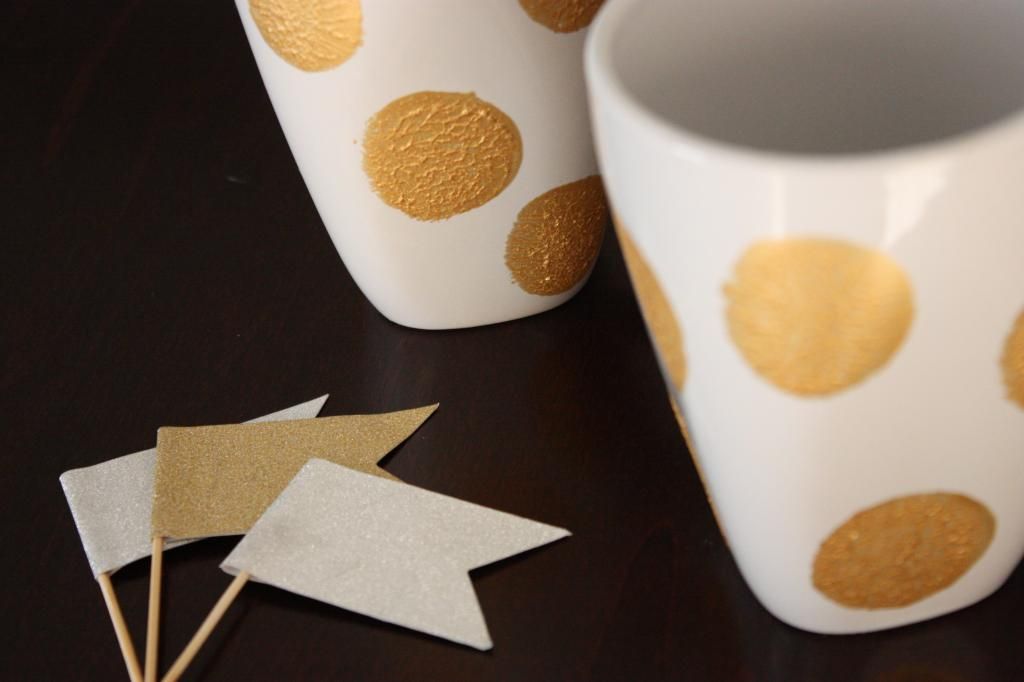
Now you have a pretty pair of mugs for your next coffee date! 


Want to make your own mugs? Michaels is celebrating Moms with a special coupon! Click here to SAVE on your next shopping trip!


This post as part of a sponsored campaign with Plaid and The Blueprint Social. All opinions and love of Martha Stewart Crafts are my own, as always I only recommend & use products I really love and feel are a good fit for myself and my readers.

April 22, 2013

Introducing 5 Questions for the Blogger Series

Remember that time I did a series called Blog Roll Monday here on the blog? Well, now that I've introduced you to all my fave blogs it's time to take it a bit deeper & have some fun. I'm introducing a new series to the blog that I'm really excited about on May 1st! 

5 Questions for the blogger will showcase some of mine & your favorite bloggers, asking them 5 fun questions in hopes to get to know them better. Some of them you'll know, and others you'll be discovering for the first time but my hope is that you'll find another inspiring blogger and share the love. 

Join me back here Wednesday, May 1st for my first interview with one of my fave DIY bloggers! 

Happy Monday friends! 

Spring Shoes Styles with Payless

I got a coupon from Payless a couple weeks ago, and while I usually don't go there often I've found a few pairs of shoes over the years from there that I've liked. I also like some of their kids sandals and shoes.

Back to my coupon, it made me want to check out online some of what they had. I was happily surprised at how much I found that I liked. So, I rounded up some of my fave Spring styles from Payless.

From flats to wedges they have a little bit of everything.

Spring Shoe Finds at Payless


Which ones are your faves? Got any secret shopping places too?

I was not paid at all to say this, nor am I affliated at all with Payless just love these styles. 

April 19, 2013

Sitterati App Review for SitterCity


A few weeks ago I was able to test out a new app called Sitterati by SitterCity. This new app allows parents to book, pay and review sitters through their mobile device. I love the idea behind the Sittercity web site allowing parents to "share" sitters, give reviews and reccomend sitters to other families. Finding a sitter for your family is an important decision and when you find a good one you're likely to sing their praises and let other parents know how great they are.

The new Sitterati app allows you to post available sitting jobs for your family and see who's available on the dates you need. It also allows you to pay your sitter right from the app if you'd like instead of having to use cash. You don't have to pay your sitters this way but it's a nice option to do so if you'd like to go this route.

For a parent one of the benefits is that you can keep track of all your sitters in once place, you can also create a "job" and send it to all your sitters at once instead of sending individual messages. This helps save parents time, and I think that is so essential for any parent. You can also get confirmation right from your sitters via the app when they accept your job. All of these things can be done right from the app itself.


Over all I really liked the look and feel of the Sitterati app. The only thing that I don't like is that there is no back ground checks made via the app. The idea is that your using sitters you already know, or have shared with you by other parents. So you really need to do your research as a parent if you're looking to book sitters that you've never worked with or talked to before. I suggest doing this before you "book" a sitter and pay them.

Otherwise it's a great way for parents to connect and share sitters for when you need them.

I was selected for this opportunity as a member of Clever Girls Collective, and the content and opinions expressed here are all my own.

April 17, 2013

Tex Mex Chicken Skillet

 photo texmexchickenskillet_zps62500fb7.jpg


Adapted from 29 Minutes to Dinner from Pampered Chef

You'll need:
1 cup cooked brown rice
1 and a half cups corn
1 can black beans
3 chicken breasts, cut into cubes
1 package taco seasoning
1 cup shredded cheddar cheese
1 tablespoon oil

In a large skillet heat oil over medium heat, add corn cook until golden and just has slight brown marks on it. Remove from pan.

Add in chicken and cook through. Once cooked add taco seasoning with water according to the package. Add in corn, black beans, and cooked rice and heat through.

Top with cheese and melt.

Serve with chips and top with  cilantro lime avocado dip. 

April 15, 2013

A Mani/Pedi Party with Sally Hansen #iheartmynailart

I love doing my nails at home, my Husband got me a foot spa for Christmas once and I love pampering myself at home this way. This past weekend we had some friends over for a BBQ. My friends also have daughters Ava's age so I thought it would be really fun to have ourselves a mani/pedi party and do our nails as well as each of our daughter's.

Lucky for me there's a Walgreens down the street from my house. I made a quick stop to check out some of the latest nail polishes and goodies that Sally Hansen had to offer. They had so many fun displays, and I loved this mint & coral color combo I saw right away. To see more of my shopping experience check out my Google+ album here.


Using my Balance Rewards card these are 2/ $5 at Walgreens. I loved this deal and picked up several of the Xtreme Wear polishes. 
  • (3/31-4/27) Sally Hansen Extreme and Salon Effects 2/$5 w/ 1,000 points


I also picked up a Nail Art Pen, couldn't wait to use it. As well as a variety of Spring colors and glitter nail polishes. We had a lot of fun doing our girls' nails. Ava wanted hers pink with glitter, my kinda girl! 


Just a few snippets from our mani/pedi party! Now, I want to show you how I did simple color blocking on my nails and added some fun to my nail art! 


Some of the awesome Sally Hansen nail polishes that I picked up!


Color block Mani using Mint Sorbet & Coral Reef from Sally Hansen


Aren't these colors so fun and right on trend for Spring? I love them so much. I have a ton of mint going on in my closet right now so this was the perfect fit. You could do this mani in so many color combos but this is just the one I chose. I did a base coat of the Coral Reef, then I used some washi tape (thanks Kim.) and taped off half of the nail but at a diagonal and then did a coat of the Mint Sorbet. I really like the idea of an accent nail so I just did one this way. I then painted a top coat over it using the top coat strengthener. 

For more color combos and ideas check out this one and this one from Sally Hansen. 


Another fun product I loved is this Nail Art Pen, they come in just about every color I chose a white one. And did a polka dot effect on my thumbs, I loved how it turned out. 


You could also use this pen to make stripes, flowers, stars, even a chevron pattern. The possibilities are endless. Just a tip: use a clear top coat to seal your nail art or else it'll wash off. 

With so many fun options Sally Hansen has me covered and I can't wait to do my nails again at home.

click here
For more ideas and inspiration check out Sally Hansen here:

I am a member of the Collective Bias®  Social Fabric® Community.  This shop has been compensated as part of a social shopper insights study for Collective Bias®  and COTY #cbias #SocialFabric, all opinions are 100% my own. As always I only recommend products/services that I myself would use and feel are a good fit for my readers.

April 10, 2013

A Striped Half Bath Makeover

I'm back today with another house update. Slowly things are coming together, and we're taking our time. As a result I'm really loving how these spaces are coming together, even if this is the bathroom.

 photo halfbathbefore4_zpsb58a0f4f.jpg

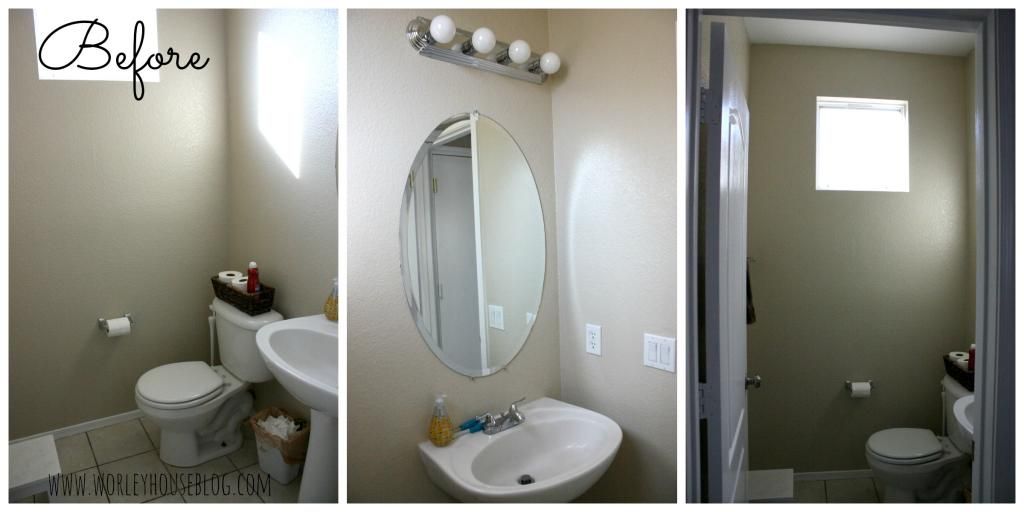
Today I'm going to show you how we made over our half bath room. Located just off the kitchen, it's the last stop before the garage. I wanted to do something fun, it's such a small space and I kinda think bathrooms get overlooked at times so I wanted to make it something fun since this is the bathroom our guests use when they come over.

Here's a quick before:

 photo halfbathbefore_zps86966477.jpg

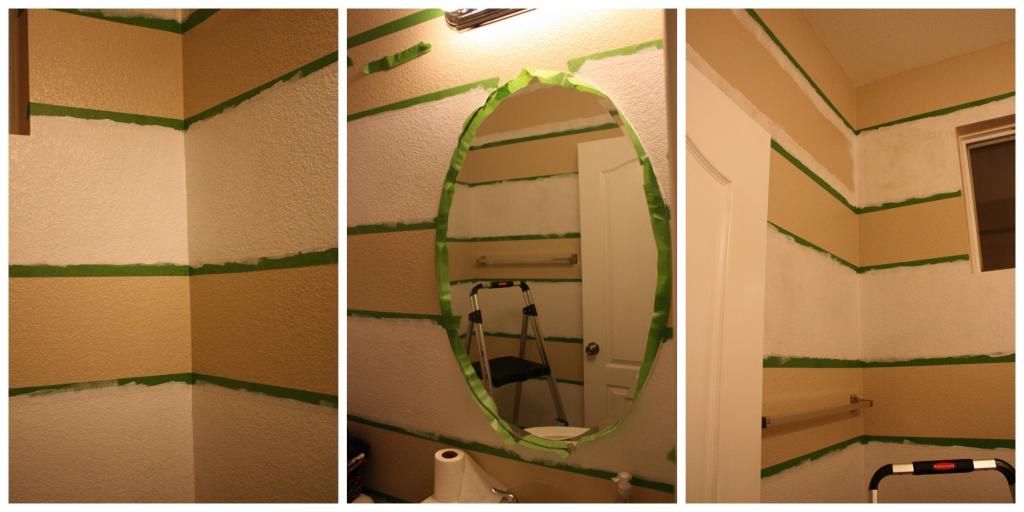
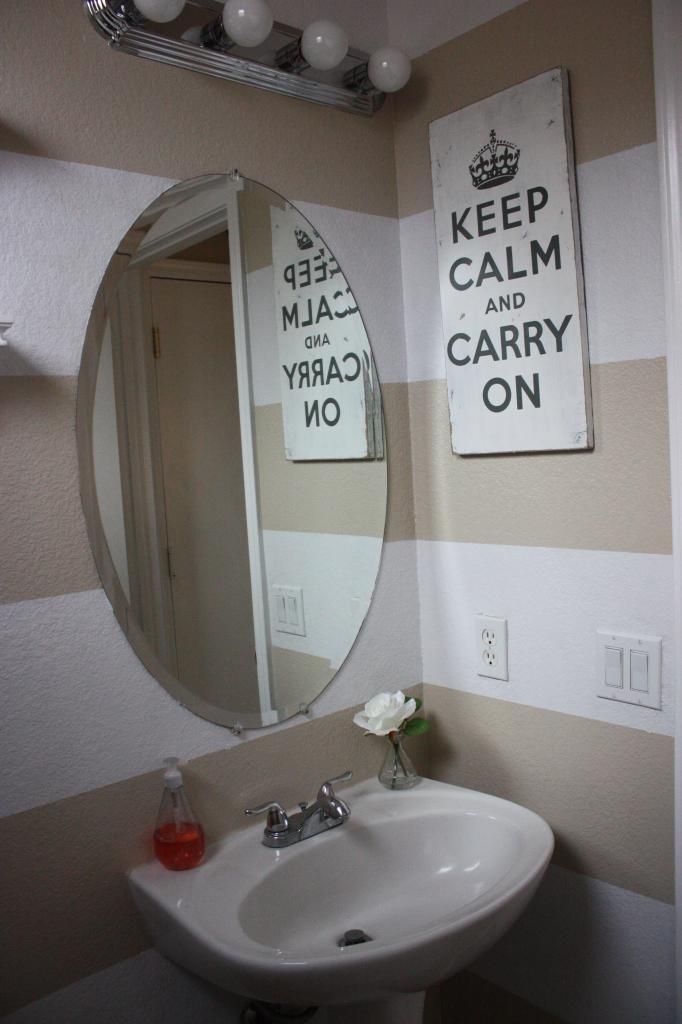
Our home was painted a nice neutral color so we decided to do thick horizontal stripes all over the bathroom. We started by taping our stripes off at 12 inches apart, using Frog Tape. That's my fave brand of tape to use.

 photo halfbathbefore1_zpsb81e9e70.jpg

Then we started painting. We used Olympic's "Snow" and painted stripes. I love Olympic paint because it's low VOC and I love that especially with two little ones in the house I don't have to worry about harsh fumes and chemicals.

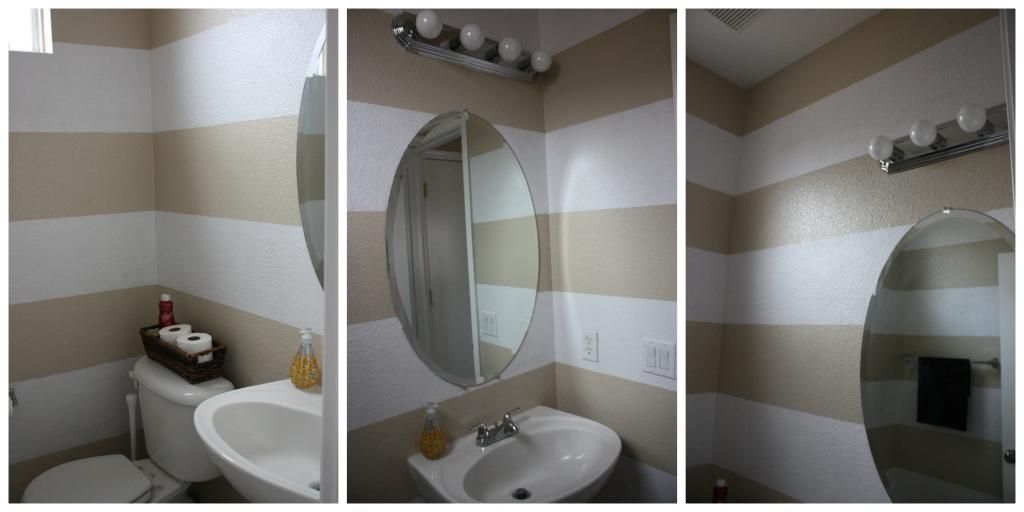
When we finally ripped all the tape off it was pretty fun,

 photo halfbathbefore2_zpsab65c9cd.jpg

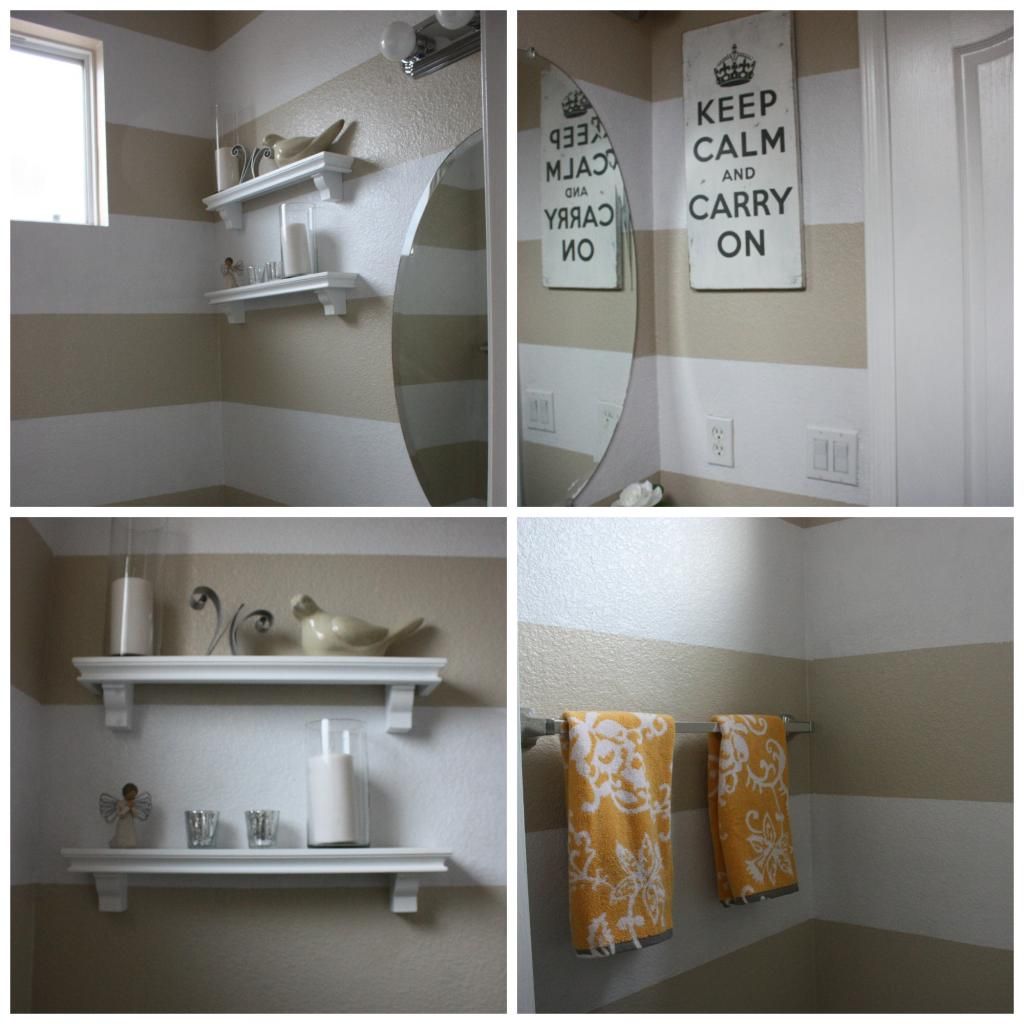
Then I started to decorate, we added some shelves above the toilet. Picked up some pretty yellow towels, and shopped the house for the rest of the stuff to add, here's the after.

 photo halfbathbefore3_zps59cea407.jpg

 photo IMG_3960_zps0d4d88e3.jpg

I really loved how it all turned out, and it makes me so happy every time I walk into the bathroom. I still want to add a new light fixture but for now I'm really happy with it. Have you painted any bold stripes in any of your rooms lately? If not, you should they are so fun!

source list:
shelves// target
yellow towels// world market
flower on sink// lowes
mercury votives// target
dove// downeast basics
"W" monogram// our wedding cake topper
willow tree figure// gift
glass hurricanes// gift
candles// ikea
keep calm sign// groopdealz last year

April 8, 2013

Perfectly Soft Chocolate Chip Cookies

Guys I have a special treat for you! Today, I'm sharing my perfectly soft chocolate chip cookies. These cookies come out of the oven soft and so good! Wanna make some of your own and wow your family?!

Good, let's get started!

 photo perfecltysoftchocolatechipcookies_zps05e9c1cf.jpg

Start by preheating your oven to 350 degrees.

1/2 cup butter
1/2 cup shorting
2 cups flour
3/4 cup brown sugar
1/2 cup sugar
1 egg
1 teaspoon vanilla extract 
1 teaspoon baking soda
1/4 teaspoon salt
1 and a half cups chocolate chips

Combine flour, baking soda and salt together. In another bowl combine softened butter, shorting, sugar, brown sugar and vanilla. Beat until creamy. Beat in egg. Gradually add flour mixture and mix well. Stir in chocolate chips. 

Bake 8 minutes. 

This is the important part, don't bake over 8 minutes. Cookies will come out of the oven looking like they are gooey and not done, trust me they are. 

Allow them to cool on the cookie sheet they will stiffen up a bit but will still be soft and gooey. Add a glass of milk and get ready to taste the best chocolate chip cookies ever! 

Enjoy.

 photo IMG_3674_zpsd70347aa.jpg

******************
Follow on Bloglovin

April 5, 2013

Coffee Date: Slowing down, enough to wait.

Happy Friday friends!

This week went by so fast, if I'm being honest it's been a hard long week. Do you ever have those weeks or days when the good stuff is overshadowed by all these hard things that happened? Where you're trying to just remember the bits and pieces that are good and great just so you don't get overwhelmed by the negative? Or maybe that's just me.

Today, no vlog. I may just cry if I did a vlog and who wants to see that?!

Today, I want to be honest. With myself, with you. Things aren't always running smoothly, I have my good days and bad just like any one else.

If we were having coffee today, I'd tell you that this has been my view for much of the week.

Holding this little guy. 

Because if we we're having coffee today I'd share with you that the transition from 1 to 2 children has been hard on me. Much harder than I thought. 


He has completely different needs than Ava did. He's teaching me how to parent all over again. It's a joy, but it's also very trying at times.

I've let the laundry and cleaning wait just one more day.


I've let the whole world stop pretty much this week just so I could focus on my babies and my home.

If we were having coffee today I'd share with you that even during these trying times in motherhood it's such a blessing. And, I'll be honest I've spent more time with me & the Lord. He's drawing me closer to him during these days when I feel like I could give up.

I wait.

I wait on the Lord.

This week I won't lie I feel a little weary. I feel a little overwhelmed. But, I'm thankful for my family. For this awesome gift of being a mom. For how the Lord encourages and sustains me.

If we were having coffee today I'd share with you some encouraging versus I've been praying and waiting on this week.

Wait for the Lord, be strong and take heart and wait for the Lord. Psalm 27:14

Come to me all you who are weary and burdened and I will give you rest. Take my yoke upon you and learn from me, for I am gentle and humble in heart and you will find rest for your souls. For my yoke is easy and my burden is light. Matt. 11:28-30

If we were having coffee today, what would you share with me?

linking up with Alissa today.

April 4, 2013

{DIY} Tissue Paper Tassels

Hello, friends!

Today, I want to share with you another element from Ava's third birthday party. I made simple tissue paper tassels to decorate the dessert table for her party. These are really simple to make, and really add a fun element to your party decor.


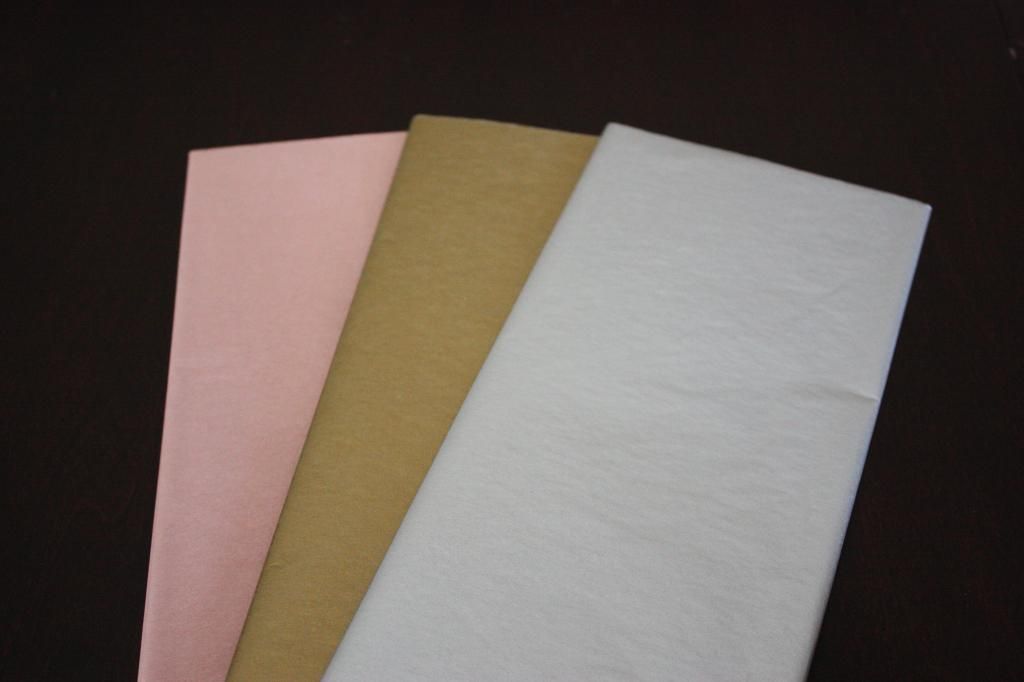
Let's make our own, shall we? I bought my tissue paper at World Market it's a little pricey there but I had a coupon for 10% off so it was little better. I just loved there metallic color selection and colors. You can use any tissue paper you like, I choose three colors that matched her party decor.

 photo IMG_3499_zpsa5151576.jpg

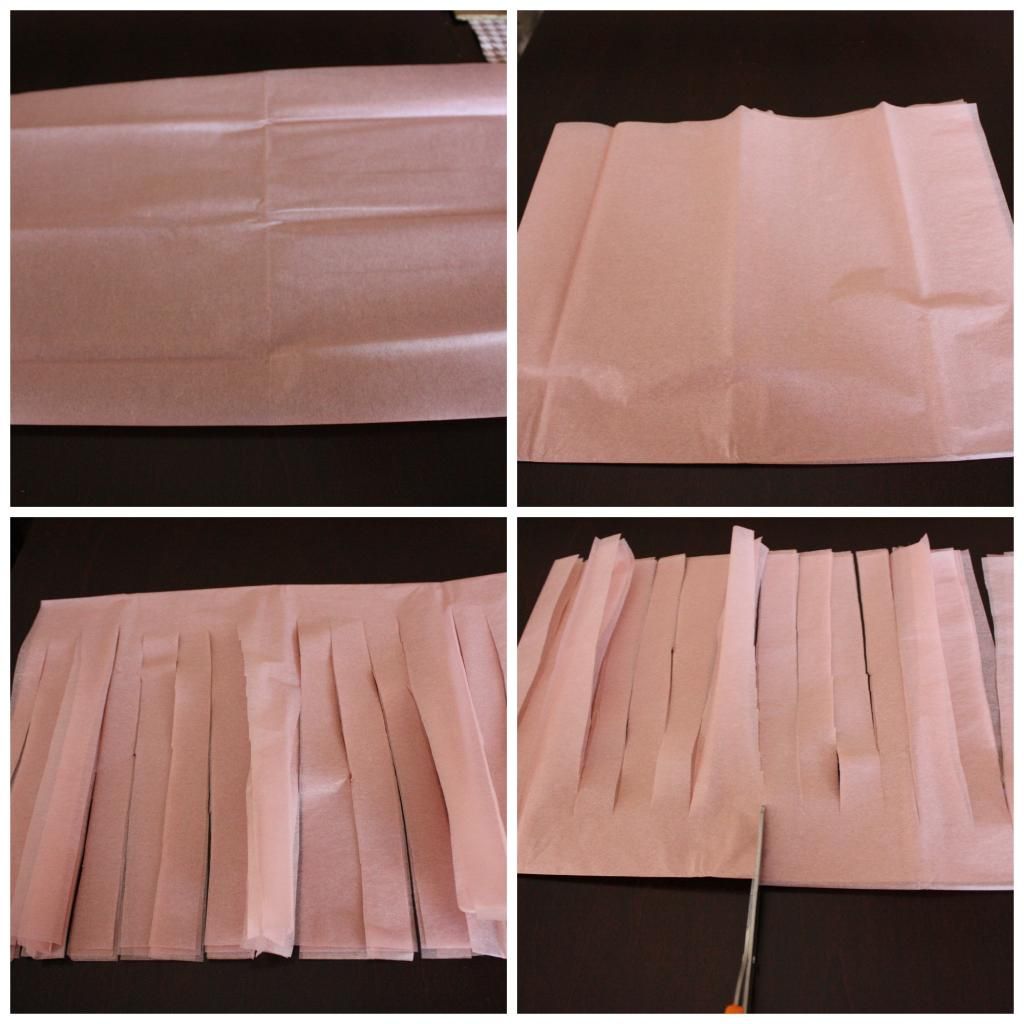
First grab one sheet of paper and fold in half the long way, then fold it in half again as show below in the first two pictures on top.
 photo tissuepapertassels1_zpsc00b22e9.jpg
Then cut your paper into strips across. Mine were about half an inch apart, as you can see the cuts weren't always straight either. That doesn't matter much since they are going to be folded just go with it.  After you're done cutting your paper cut it again down the middle.
 photo tissuepapertassels2_zps5ba9de29.jpg

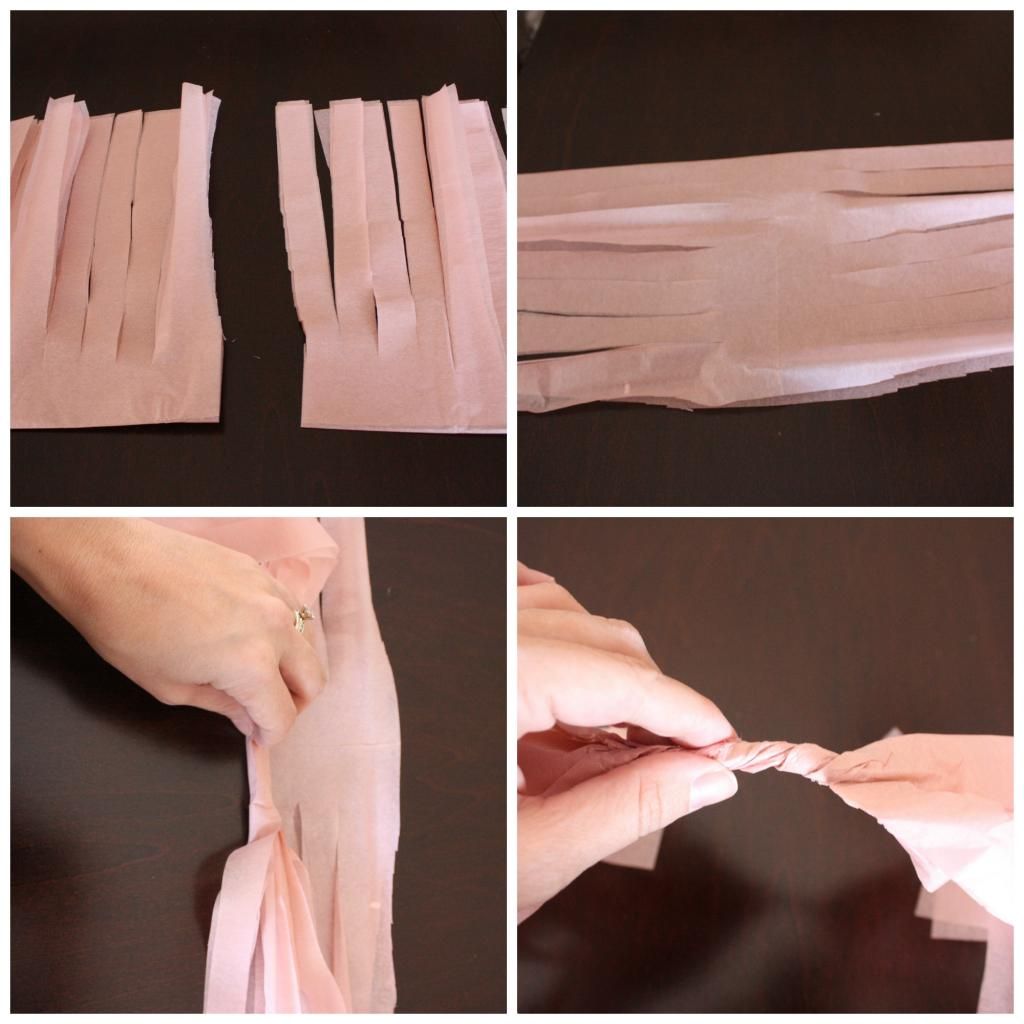
You'll then have two separate pieces. Open it up and roll it down the center, then once it's all rolled twist the paper around tightly but not to much you don't want it to tear or rip.

 photo tissuepapertassels3_zps4fc65499.jpg

Then fold it over to make a loop. I used some masking tape to keep my tassels from unraveling. Each piece of tissue paper will make two tassels. Keep repeating the steps till you're all done with your tissue paper. Then string on some twine (I used some gold bakers twine) in a repeating pattern.


Then they are ready to hang for your party! These are so impressive I think and add a great touch to party decor!

Now that her party is over I just love them so much I want to hang them in her room. I'll be back in a few days with a full post of her beautiful birthday party!

************************
Follow on Bloglovin

April 2, 2013

1 2 3 Months!

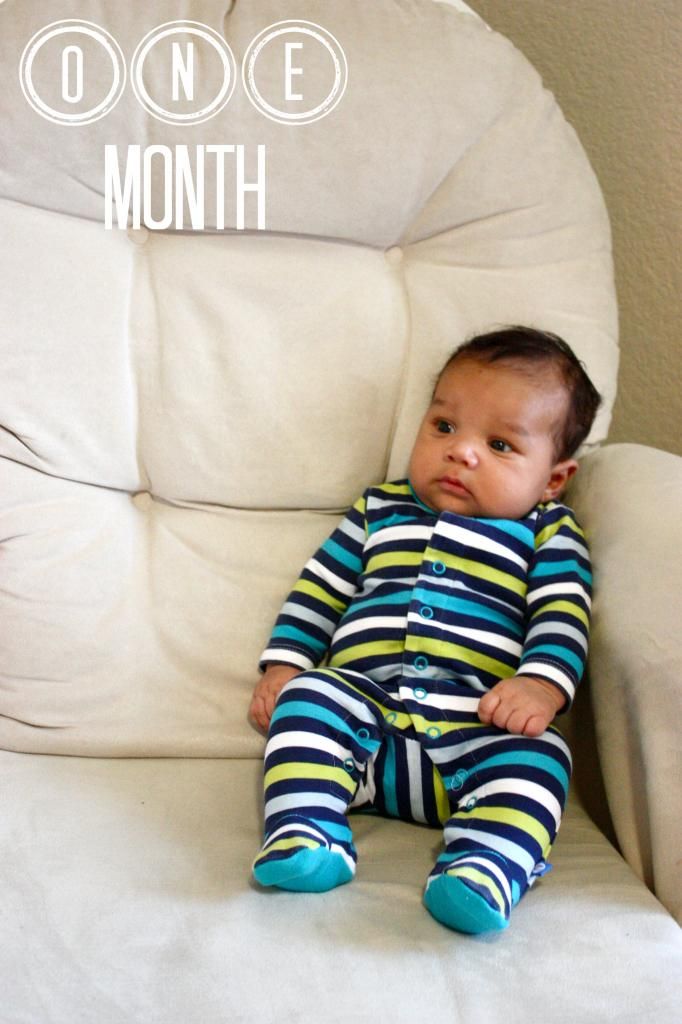
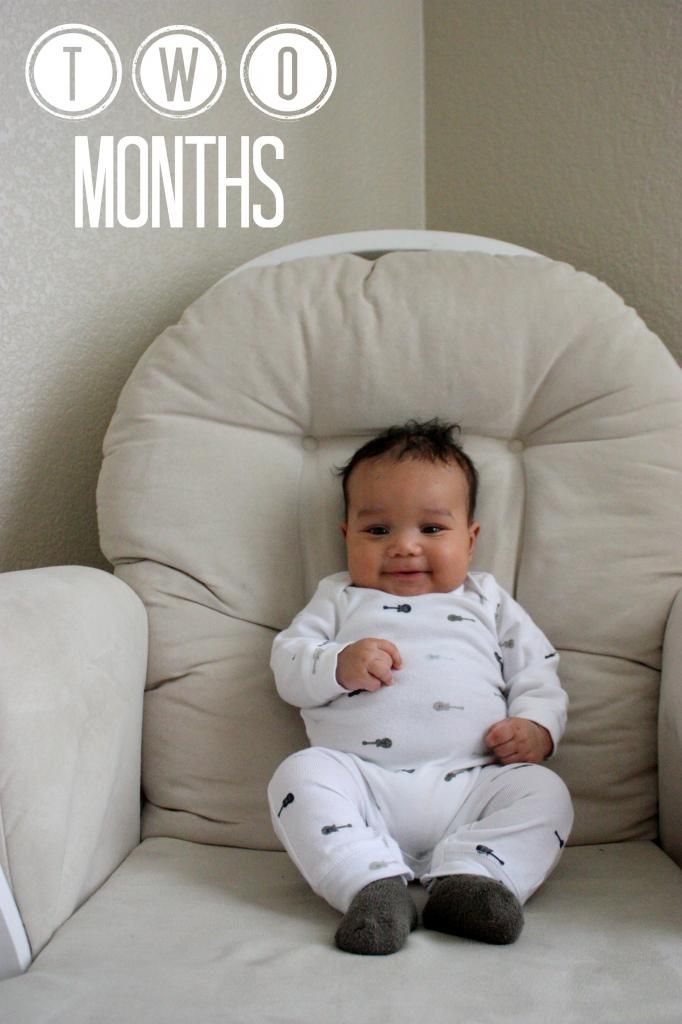
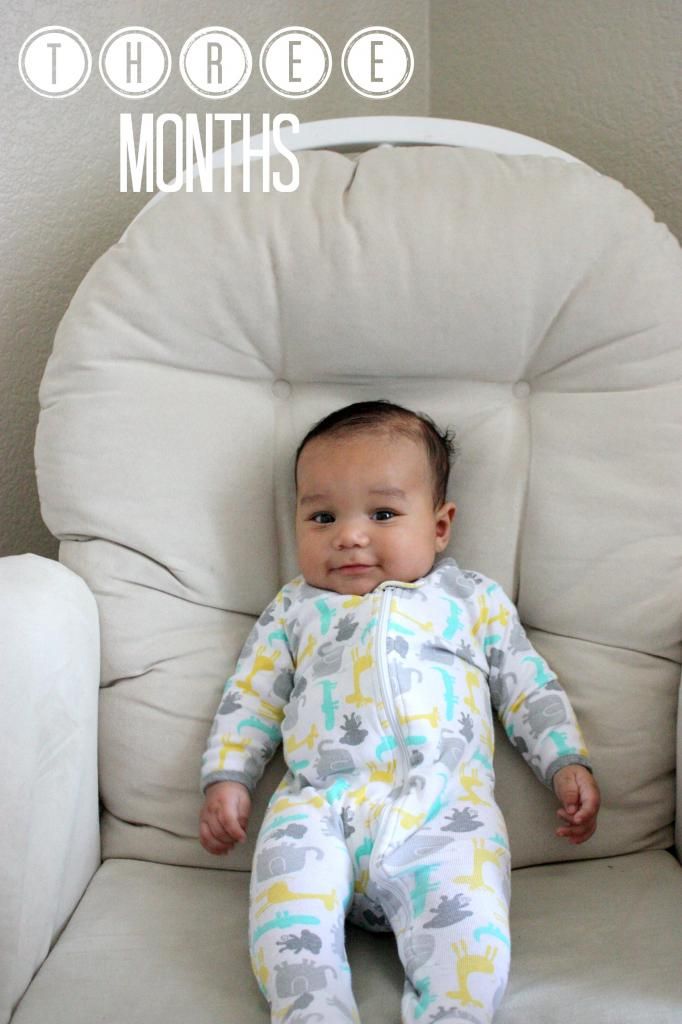
Can you believe that my baby is three months old already?! The time has gone by fast and I find myself wanting time to slow down and even stop for a bit. I guess that's what happens when you have a baby 9 day before Christmas, have family in town for almost a month, celebrate your first born's three years of life and have more family in town.

Time just goes.

There's so many emotions and feelings that have come with adding another child to our mix, and the best possible way to describe it is the feeling that our family is now complete with Zane.

I felt this same feeling just a few short moments after he was born, I didn't want to say it out loud yet because you know he was just born. But now three months later I am still feeling that same way.

He brings so much joy to our life. He's changed the way I mother. And I love my two babies oh so much. 

 photo zaneonemonth_zps939e9162.jpg

A little update on Zane; he's wearing size 2 diapers. He's currently sporting size 3 month clothing sometimes even 3-6 month clothing. He weighs just a little over 12 pounds.

He's quite the cat napper taking several 45 minute naps through out the day. Sleeping 4-5 hours at night and waking up to nurse. 

There are so many differences between Ava and Zane as babies. Ava always slept really well from the beginning and Zane he's all over the place with sleep. His needs are so different than her's seemed to be as a baby, therefore I find myself parenting them completely different. 

He's teaching me to slow down, and throw away everything I knew about parenting a baby in order to give him what he needs. It's crazy to me how different they are and have been. 

 photo zanetwomonths_zps501bd642.jpg

His nursery is still not completely finished I'm hoping to have it done by the time he's 5 months old. There's just a few more things that I want to complete before I call it done. The process has been really fun this time around making a space for a little boy. 

 photo zanethreemonths_zpsf46f1255.jpg

He is really starting to smile a ton, be more alert, coo and he's laughing which is so fun to listen to. He's already rolling over from his stomach to his back and has been for a while now. The first time he did that he was just over a month old. I couldn't believe it. 

Ava is already anxious for him to start running around with her. Asking me all the time when he's going to walk with her. She loves him so and I love seeing their relationship already. I can tell they are going to be great buddies and I hope they will be great playmates for each other. 

I am reminding myself daily to soak in these moments.

********************************

Ok friends, Google Reader will be no more come this July! I know bummer. 

So, I've been on the hunt for a new reader and I've been using Bloglovin' for the 
last couple weeks. It's super simple and easy to use. I'd love it if you joined be there.

Follow on Bloglovin

LinkWithin

Related Posts Plugin for WordPress, Blogger...