Photobucket Photobucket Photobucket Photobucket Photobucket

December 31, 2011

Our Christmas Vacation

We've had a great 10 days here in Iowa for Christmas! It's coming to a close, we jump on a plane tomorrow back to Arizona. First we're going to enjoy ringing in the New Year with family tonight. Here's a few high lights from our Christmas vacation.

Photobucket
{Our family on Christmas Eve}

Photobucket
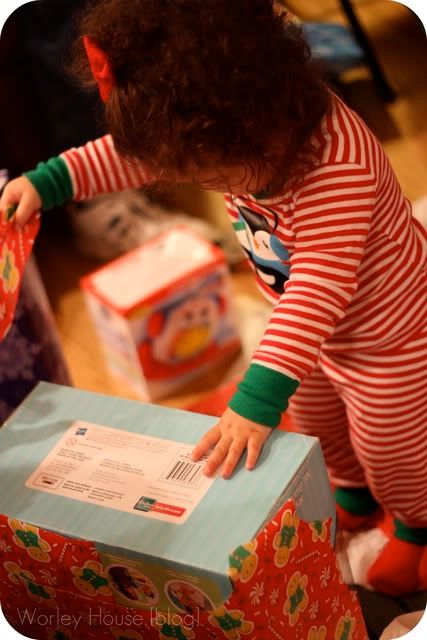
This year it was a lot of fun watching her open gifts. She was really into playing with everyone else's gifts, and not opening her own. It was sorta cute. Christmas is truly magical seen through the eyes of your own child. 

Photobucket
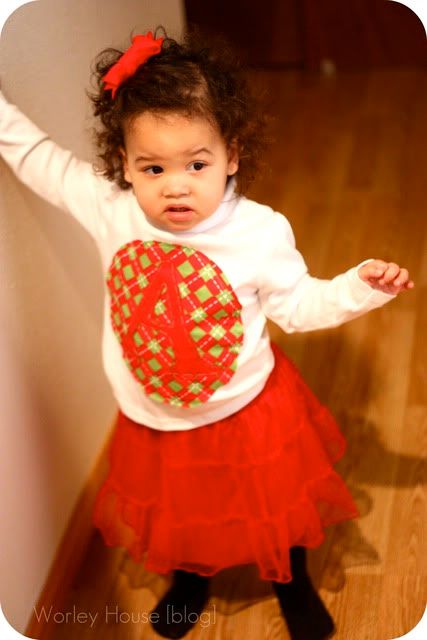
{The Christmas Outfit}

These were some of my favorite gifts to give. They all turned out so cute! My sister bought the girls these matching red skirts to go with their shirts. 

Photobucket
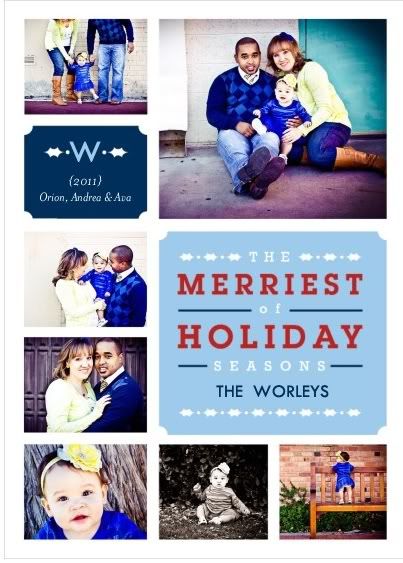
{Our family Christmas Day}

10 days went by so fast! They were filled with lots of wonderful family time. I got to sneak in a date with my Hubby, lunch with friends, and time with my siblings while the Grandparents took the kids to see the Christmas lights. Orion and I teams finally played against each other in a bowl game, his team won which makes me very sad! As we close 2011, I'm thankful for all the Lord has blessed us with. And, very thankful for this time we've had with family during this season. 

I'm also looking forward very much to 2012! We have so many wonderful things on the horizon I just can't wait. I'll be back in a couple days to reveal my word for 2012 as well and start the new year!

December 30, 2011

{Top 10} Posts of 2011 & A Bloggy Review

Oh, hello there last week of the year! How did you get here so fast? I think it's true what they say about having children makes time go faster, because I definitely feel it.

SO many great and wonderful things have come out of blogging in this last year. I'm amazed and very appreciative. I love this online community here, I love the encouragement of other women that I am seeing all over blog land and how people are coming together to help one another.

It's amazing and humbling all at the same time. I love how relationships go from online to real friendships. A year ago, I met my friend Destiny through our blogs. A friendship that quickly grew from online to dinner in her home, to real life friends who hang out and do stuff. I appreciate her friendship so much and love that she's become a real life friend.

If I hadn't met her, our husbands wouldn't have met and my Husband wouldn't have the job he has now! It's amazing how God has a plan, and how things work out for his glory & purpose! I often joke that my Husband owes his job to my blog, it's sorta funny but really kinda true!

I wanted to review with everyone the TOP 10 Blog Posts from the year {as determined by the stats} and then review MY TOP 10, the ones that maybe didn't make the list but the ones that I loved writing the most, or the ones that meant the most to me! You can see last year's list here.

TOP TEN {by the stats}
1. Closet Series Jen from Iheart Organizing
2. Closet Series Megan from Honey We're Home
3. Ava's First Birthday Party
4. Simplify Wooden Sign
5. Cabinet Door Chalkboard
6. Closet Series Cori from La Vie Petite
7. Summertime Rosette Wreath
8. The Real Reason I'm Not Pregnant with #2
9. Board, Batten & Wainscoting
10. Holiday Comforts

MY TOP TEN
1. Simplify - I started out the year with a word, and a goal! I'm happy to say that I accomplished what I wanted to this year in these terms.
2. Happy Birthday Ava - One of the BEST events of the year was Ava's 1st birthday! My first year of Motherhood complete, my thoughts for her recorded here.
3. Project Baby B - This post didn't get nearly as much attention as I think it should have, and was easily the most controversial post I've ever written. But sometimes that happens when you follow what the Lord has laid on your heart, people don't always like it. I am thankful to the many who donated to this project, for those who gave and to The Brookers who are such wonderful and amazing people who are now parents because of what the Lord has done!
4. Noble Character - a challenge to bloggers and everyone to be real and do good with this life they are living!
5. He Sat Next to Me - my encouragement to Mothers everywhere.
6. Catalyst - life changing events.
7. Summertime Wreath - my fave DIY project of the year!
8. Mine - a favorite that I wrote about my Husband.
9. My Trip to Minneapolis - fave travel post from the year.
10. Be Inspired Series - my fave feature that I was apart of this past year.

What do you think, did your faves make the list?

I've had a great journey this year blogging. I'm excited for what's next! I've got some great ideas about where I want to take this blog in 2012. My mostly, I want to do good always with this little blog. Is it to much to ask for the blog to change the world? Make it a better place? Provoke thought? Bring JOY and encouragement to those who read it? I think not, and that's exactly what I want this blog to be about.

Thanks for reading, commenting and making blogging so much fun for me this last year! I also want to thank other fellow bloggers for featuring Worley House in some small way this year. I really enjoy being apart of this awesome community, and you all make it so special to be apart of!

Joyfully,
Andrea

December 28, 2011

{Top 20} New Blogs of 2011

Photobucket

In keeping with a tradition I started last year, I wanted to review the TOP 20 New Blogs {new to me} I've grown to love in 2011! I love finding a new blog, and I'm sure a lot of you do too, so here's my picks:

{in no particular order}


{you can read last year's list here.}

Okay, now it's your turn! Tell me what some of your fave blogs of the year have been, what have you been reading?!? 

Come back Friday to see my thoughts & my own Top 10 list of our little blog here! Hope you're all having a great week, we're still enjoying time here in Iowa with our family!

******

I wanted to say thank you to Megan from Honey We're Home for featuring our Christmas tree on her blog last week! You can read it here. 

December 26, 2011

Blog Roll Monday: Without Wax


Hello Friends! Did you all have a great Christmas? I hope that you did, maybe you are still enjoying the Christmas spirit! We are! We're still here in Iowa with family and are enjoying some much needed time with them. Making memories is what this time is about!

*******


I read a lot of blogs. I read a lot of decor/design blogs. A lot of photography blogs. A little bit of crafting too. But, I also read a lot of faith based blogs as well.

Blogs that make think about myself and my relationship with the Lord. Ones that challenge me as a person, challenge my relationship with God and others.

Ones that make me a better person.

One of those blogs is Without Wax by Pete Wilson.

I heard about his book when I was listening to the radio one day while I was out running errands. I think it was a God moment.

After reading his book, it sorta changed me. In the most positive way. You can read more about that here.

Shortly after that I started reading his blog Without Wax.

I always walk away with an encouragement.

Something that sparks thought.

Sometimes a good laugh, since he also blogs tidbits about his family and life.

And he's probably the only Pastor I "know" that's been in a Taylor Swift video and I think that's just plain awesome!

If you need some inspiration today, or an encouragement I invite you to visit Without Wax.

December 25, 2011

Merry Christmas!

Photobucket

Wishing you and your families a blessed Christmas day!

We celebrate the birth of Jesus today, so grateful he came for me and for YOU! 

Merry Christmas. 

December 23, 2011

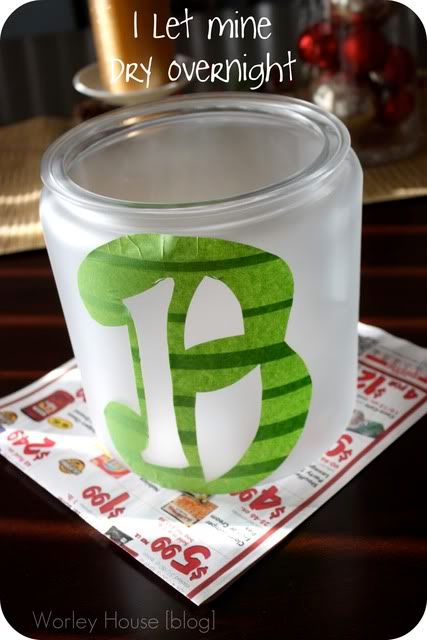
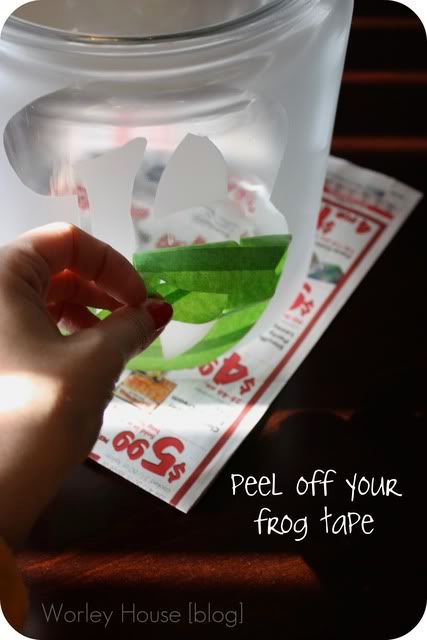
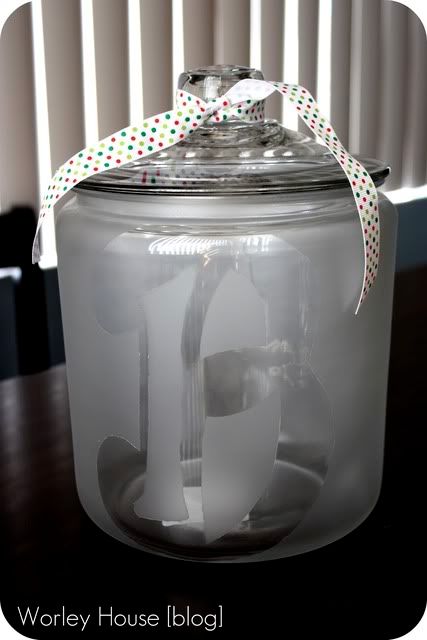
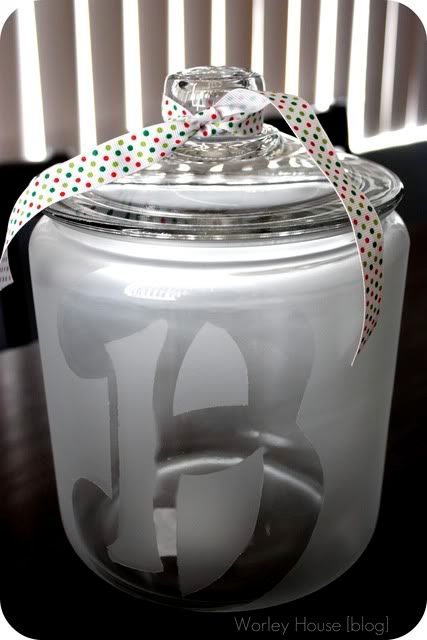
{Handmade Holiday} Frosted Monogrammed Glass Jar

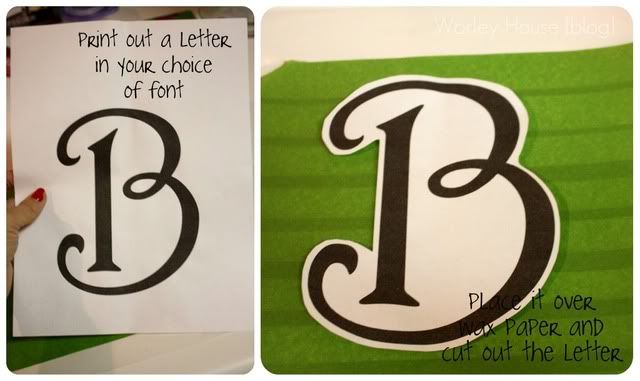
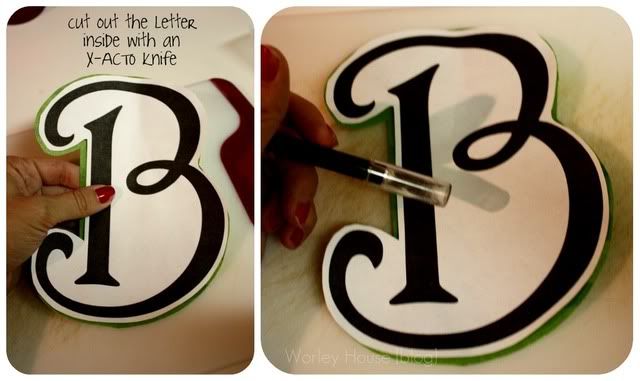
I'm back to share with you another handmade gift idea. I think this is a great idea for all sorts of occasions. I saw a lot of tutorials on glass etching. I wanted to use mostly what I had on hand so I decided to go another route. The only cost to me was the glass jar & Rustolem paint. The rest of the stuff I already had on hand.

Here's the supplies you'll need for this:
waxpaper
frog tape
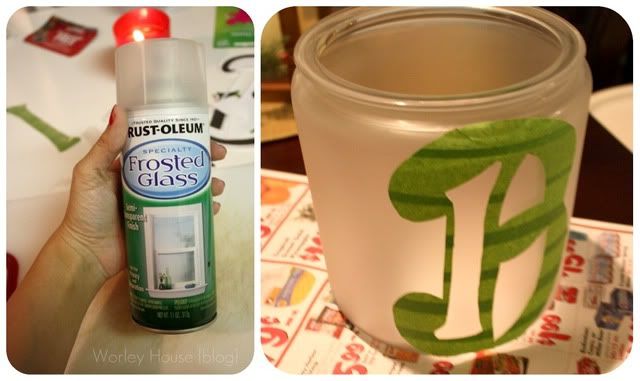
Rustolem Frosted Spray Paint {used 50% coupon at JoAnns}
X-ACTO Knife
Printed letter in your choice of size & font
Oversized Glass Jar {mine is from Wal-Mart}

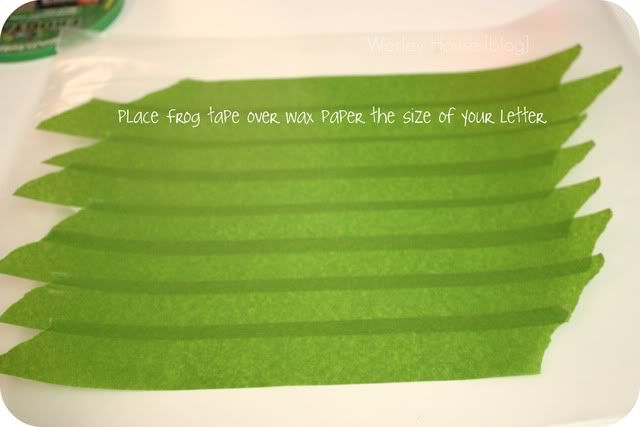
Here's what I did;

Photobucket

Photobucket

Photobucket

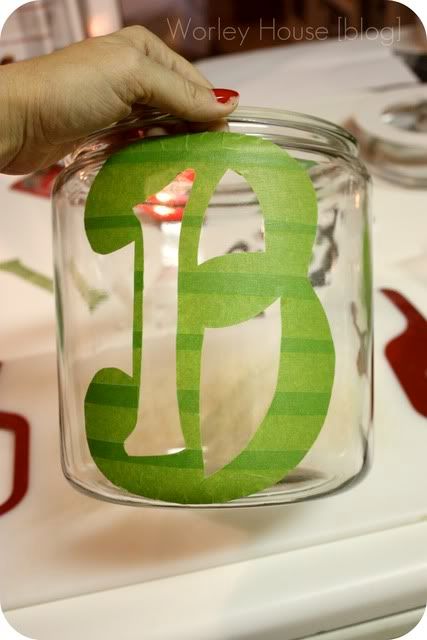
Then place your cut out letter onto your jar, make sure you rub the tape onto the jar and seal all the edges. 

Photobucket

I just followed the directions on the can, and sprayed it onto my jar. 

Photobucket

Photobucket

Photobucket

Photobucket

Photobucket

I wrapped the top with a ribbon, and placed a gift card to their favorite restaurant inside to complete the gift. 

Linking Up with:

December 20, 2011

{Our Home} Mantle Re-Mix with #KmartHoliday

I'm excited to show you what I did with the holiday decor items we recently picked up on our shopping trip to Kmart! You can read more about that experience here. 

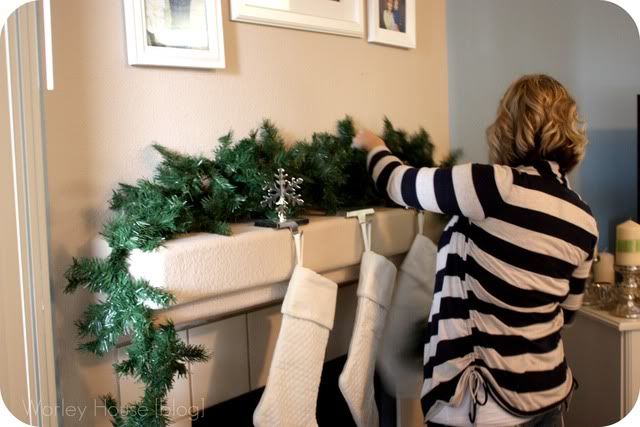
Sunday afternoon after church I got to work taking apart our mantle so that I could do a little mantle re mix with these awesome pieces I found at Kmart. The first thing I did was add another piece of garland to "beef" it up a bit, I felt like there wasn't enough, and that we need one more to really add an impact and make it "pop!"

Photobucket

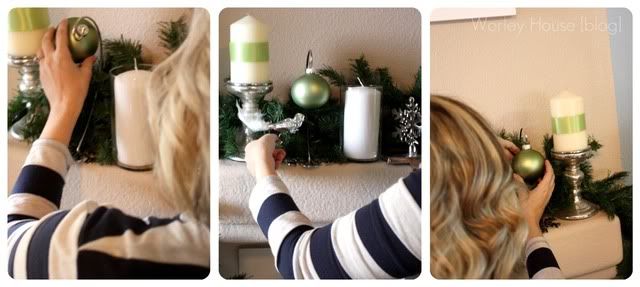
Next, I started to add in the different decor items I picked up while on our shopping trip.

Photobucket

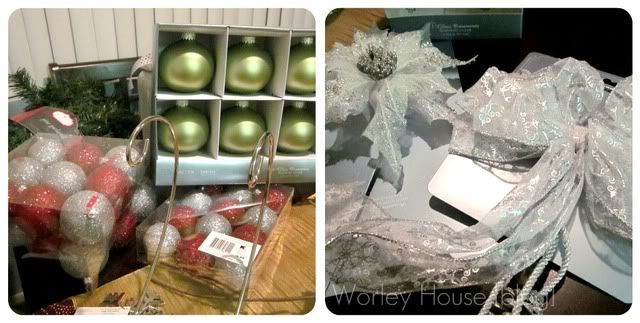
Here's some of the items that I used in the garland;
Midnight Clear Glass Bird Ornaments
Midnight Clear Glass Ornaments in Green
Trim A Tree Garland
Celebrations Ornament Hanger

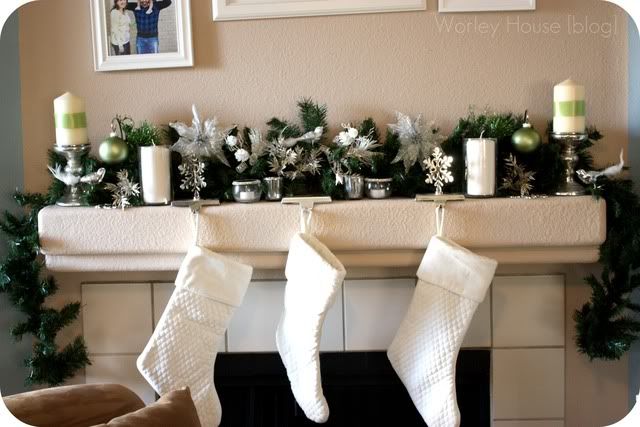
Here's the beautiful after our mantle re mix:

Photobucket

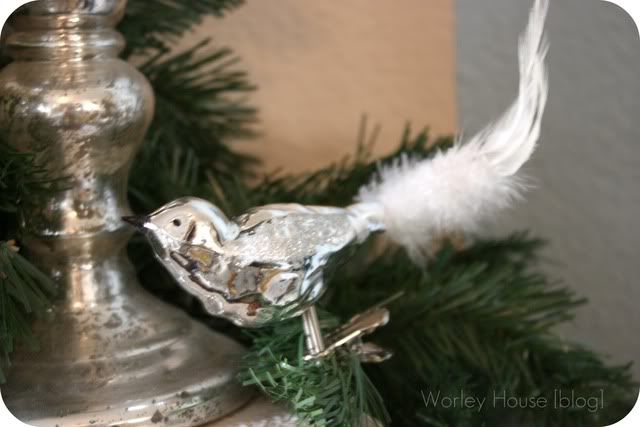
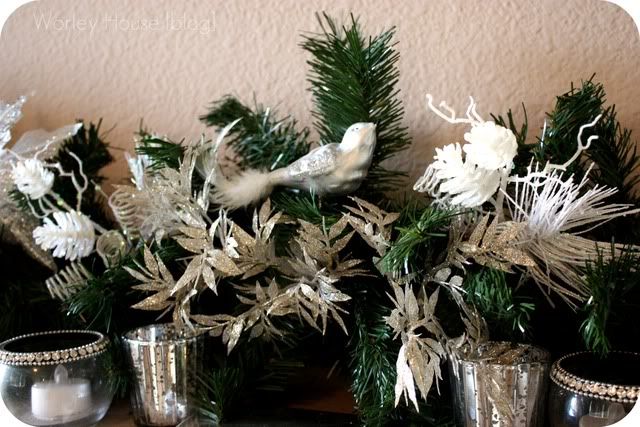
I want to show you a close up of these amazing glass birds, I have a thing for glass birds like this. So when I saw them in the store I knew these glittery, feathery gems had to be mine!

Photobucket

Pretty huh?! Here's another close up of the mantle details again; I just love how much everything sparkles!

Photobucket

I really loved how it all turned out, using some of what we already had but also adding some new fresh pieces makes it such a fun mantle to look at!

If you're still looking for holiday decor head on over to Kmart to do some decor shopping. They have some great stuff at really affordable prices. Right now most everything is 40% off, and I'm sure after the holidays it will be discounted even more. The perfect time to get decorations for next year!

You can see their full holiday collection here. 

If you haven't done so already, become a fan of Worley House on Facebook. It'd make my holiday! :)

This shop has been compensated as part of a social shopper insights study for Collective Bias. #CBias all opinions and ideas are 100% mine though. As always, I wouldn't endorse someone professionally that I wouldn't personally.

December 19, 2011

Festive Holiday Table Decorations with #ElmersHoliday & #GluenGlitter

This past Saturday night was the ladies Holiday Tea at my church. I signed up to host a table this year, which meant that I would be in charge of decorating the table, and serving my guests once they were there.

I love entertaining, to me it's one of the sincerest ways you can show love and appreciation to people. Serving them, inviting them in your home or hosting something like this. I wanted to add some special touches to my table to make it extra special for my guests. So, I started dreaming up some ideas of what I could do.

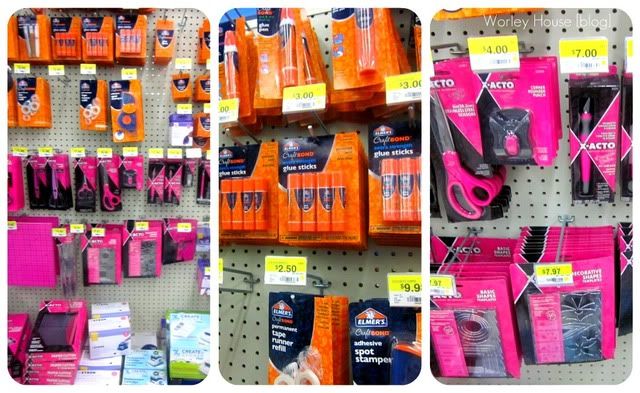
Then, I headed to Wal-Mart with the help of Elmer's & some X-ACTO products I was well on my way to creating something special for my guests.

Photobucket
Wal-Mart has the complete line of Elmer's & X-ACTO brands, one stop shopping is definitely a plus!

Photobucket
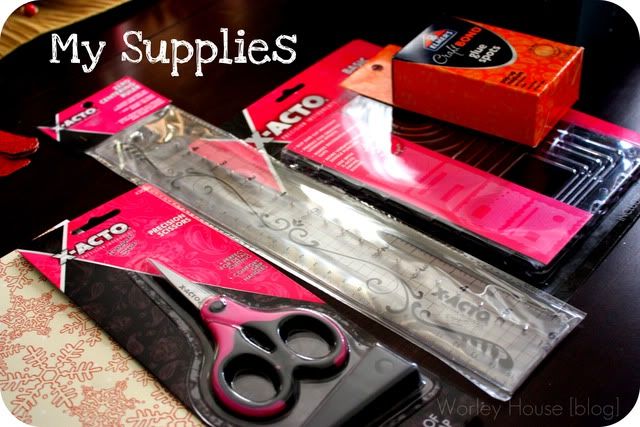
Here's what you'll need for this project:
Elmers Craft Bond Glue Spots
X-ACTO Craft Knife
X-ACTO Craft Mat
X-ACTO Zero Centering Ruler
X-ACTO Precision Sissors
X-ACTO Basic Templates

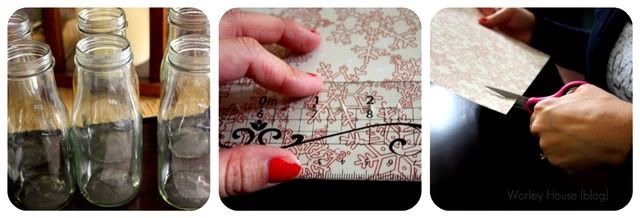
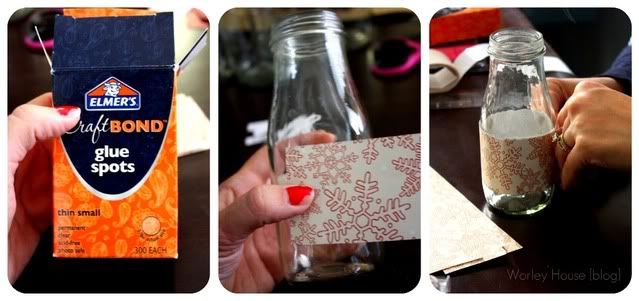
For a while now I've also been saving the empty glass bottles of Starbucks fraps, I knew these bottles would be perfect for parties and gatherings.

You'll also need some scrap booking paper (any color) to wrap your bottles with.

Photobucket

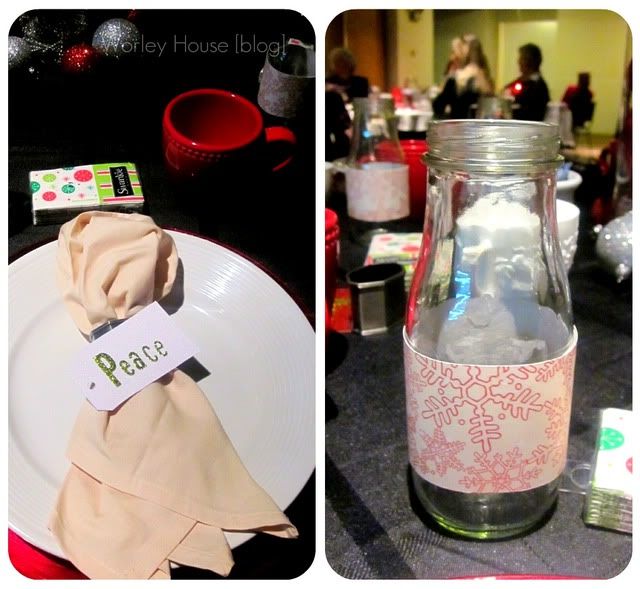
First measure out your paper so that you have enough to cover the number of bottles you have. I had 6, so I measured accordingly. Then I cut out my measured strips of paper.

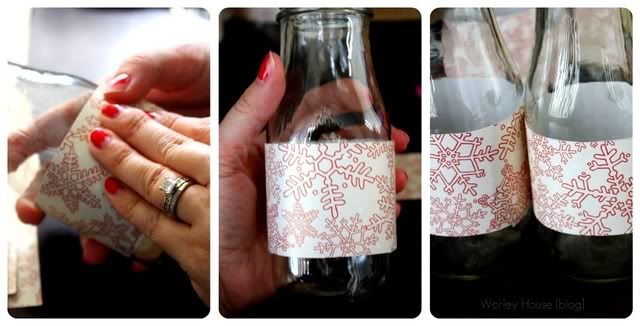
Next, using the glue spots I covered my bottles. I ended up adding glue spots as I went along and covered the bottles. These glue spots work really great, they are heavy duty and really keep things in place especially since I used a heavier card stock for this.
Photobucket

Photobucket
Here's what they looked like all finished.

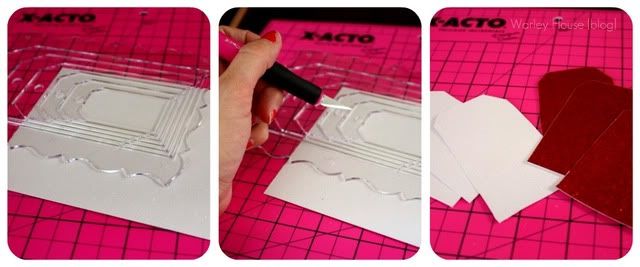
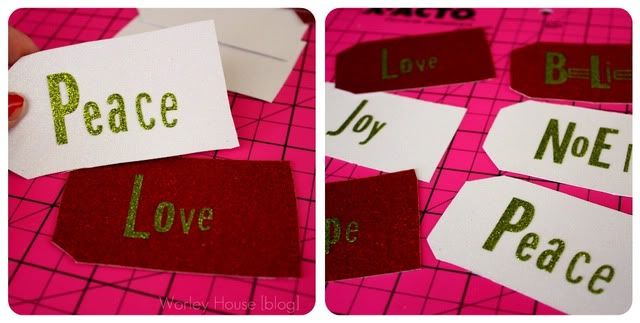
I also wanted to create some festive tags instead of place cards to use on my table. Using some glitter scrap book paper, and the basic templates I created them. Here's what I did;

Photobucket
I used an X-ACTO craft knife to cut out the shapes using the tag shape from it I cut out 6 tags with my knife. I also used the X-ACTO craft mat to cut these shapes out so that I didn't ruin my table.

Photobucket
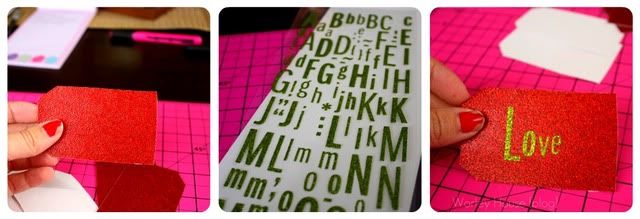
I used some scrap booking glittery letters to spell out words on my tags. I used words that reflected the Christmas season like Love, Believe, Joy, and Hope.

Here's what they looked like all finished:
Photobucket

Want to see what both these projects ended up looking like on my table? Well, here's a preview:
Photobucket

See more of my shopping experience here in my Google+ album. 

Interested in how you too can win some amazing products from Elmer's? Go visit the link below and see how you can win an entire wall of crafting supplies from Elmer's & X-Acto! 
More links for you to check out!
******
This project has been compensated as part of a social shopper insights study for #ElmersHoliday #gluenglitter #collectivebias #CBias. All opinions and ideas are 100% mine. As always I would not endorse a company professionally that I wouldn't endorse personally. 

Blog Roll Monday: See Kate Sew


Hello, Monday!

Did you all have a good weekend?!

One of my goals for the next year has been to learn to sew again. I say again, because I haven't sewn in years. In college, I sewed my own curtains for my then apartment. Yes, I was that girl who came back to school from summer break with her own homemade curtains.

My roommates didn't seem to mind. Anyway, I haven't done it since. I've had a sewing machine that was given to my by my Grandma that I've been hauling around with us every move.

A few months ago, I decided I needed to re learn this valuable skill that my Grandmother taught me. I knew the basics but wanted to learn more.

So what does any DIY'er do when they want to learn something new? Well, they turn to the Internet for inspiration and tools! Right!

I started searching for different blogs and videos to teach my different sewing techniques. I found this one, called See Kate Sew and I fell in love with her simple projects and instructions.


It was easy to follow along with her, and she's got great projects for beginners and some for more advanced people.

Click here for her list of Sewing 101 if you'd love to start too and learn something new. 

Her blog isn't just for sewing either, she's got great projects too.  Check them out here.

Happy Monday & Happy Sewing Friends!

December 16, 2011

30B430: 2012 Challenge

Photobucket

For 2012's challenge I wanted to do something because I'm turning 30 next October! So I decided 30 goals to complete by the time I turn 30 years old.

Some of these goals are small, some are big. But, they all are goals or ideas that I've been thinking about that I've wanted to accomplish.

{in no particular order}

  1. Go to a movie solo
  2. Pay for someones coffee at Starbucks
  3. Become a full time SAHM
  4. Build something for our home
  5. Establish an exercise routine and stick with it
  6. Learn to use iMovie & make a movie for our family
  7. Take another photography class
  8. Reach 50 sales in my Etsy shop
  9. Take steps towards having my book published
  10. Bless a family in need
  11. Watch the sunrise and sunset on the same day
  12. Pay off all our debt besides school loans
  13. Do 30 Random Acts of Kindness on my birthday!
Join me in the next 365 days as I try to accomplish every goal on the 30B430 list! I'm excited to accomplish my goals, I'll be blogging along the way sharing my experiences and thoughts as I cross each one off the list!
*****
Check out past challenges here:
2011 Challenge: 12 in 12
2010 Challenge: Be Creative 

December 15, 2011

Shopping Holiday Decor with {#KmartHoliday}

I really love Christmas! I love just about everything about it, including decorating my home. It's about just the only holiday I really go all out on with decor. I would do different themes/colors in every room I think if I could. Someday I dream of having multiple trees in rooms decorated in different ways! So, naturally I was excited to get the opportunity to go shopping at Kmart in partnership with Collective Bias!

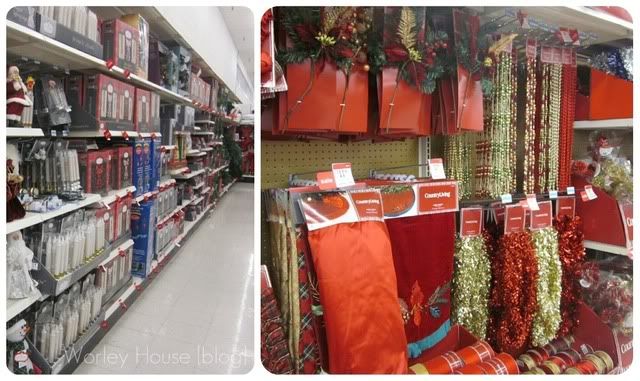
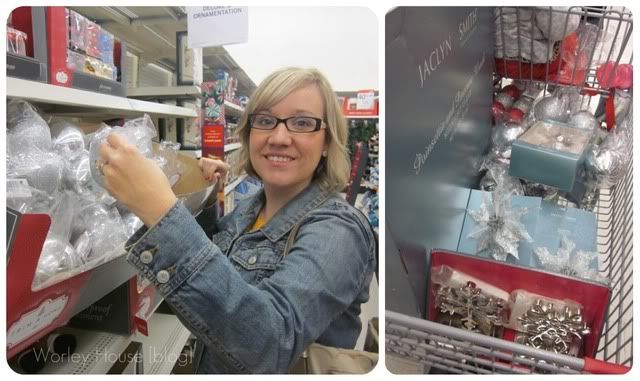
Hubby, Ava and I put on our coats and headed out the door to check out all that Kmart had to offer for holiday decor. I was pleasantly surprised at all the wonderful decor items they had to offer at Kmart. And, we went at a really great time because a lot of the ornaments were 40% off already in addition to a really great price! We were able to get more for our money!

Wanna take a look at some of the awesome things we scooped up? Okay, sure I'll show you;

Photobucket

Aisles and Aisles of golden, red, green filled the store. When I start with holiday decor I'm always drawn to colors first. What are the colors we're using in our home? What colors could we use more of, and what ones can we accent with? Kmart didn't disappoint in this department either, they had a great selection of items in a wide range of colors.

Photobucket

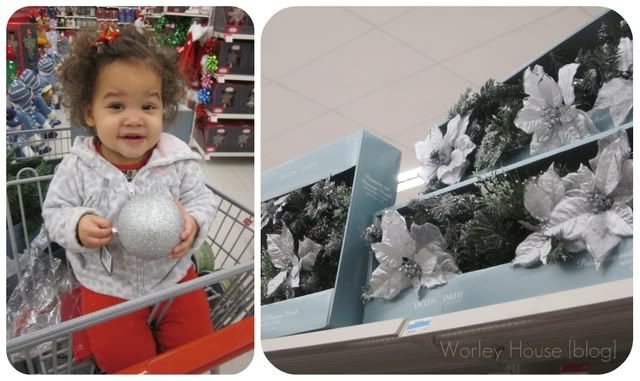
We found some great items in the holiday decor items; we found some ornament balls in various colors, some really fun ornament hanging options too. My favorite was the Midnight Clear wreaths we found with matching garland. 

You can see them here in the photo below! Those were our jumping off point for the rest of our decor items we choose.
Photobucket

Even Ava got in on the holiday decor action. She was a great assistant holding various ornaments for us in the shopping cart.

Come back next week to see how we use all these items and more and incorporate them into our home for the holidays.

Photobucket

See more of our shopping experience in my Google+ album here. 
*****
This shop has been compensated as part of a social shopper insights study for Collective Bias. #CBias , All opinions & thoughts are 100% mine.

December 14, 2011

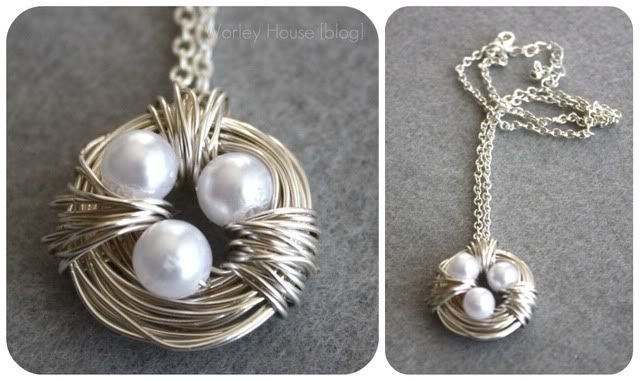
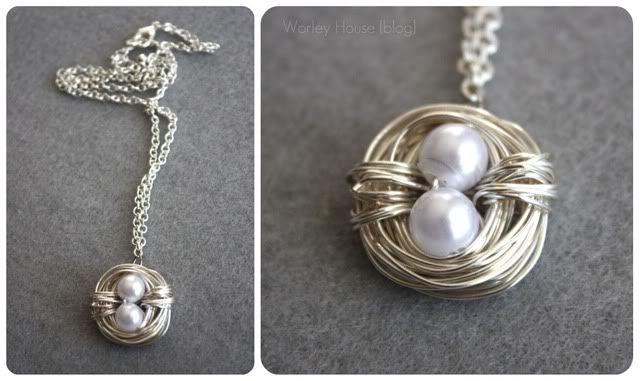
{Handmade Holiday} Mama Bird Nest Necklaces

I made two of these pretty necklaces for gifts for some special ladies in my life. I won't tell you who just in case they read this post! :)

I saw this tutorial on Pinterest and knew it would be a personal gift that I could give this Christmas. I've never made any jewelry before in my life so I was a little worried but it ended up being an easy tutorial to follow.

I made two of them; one with three "eggs" and one with just two "eggs" in the nest. I used an already pre cut chain instead of measuring one like the tutorial suggests. My chains were from Michael's, the wire and pearls came from JoAnns craft store. I also used a "shinier" wire than was used in the tutorial.

Photobucket

Photobucket

They turned out really beautiful, and I can't wait to see the faces on the ladies I give them too. I really think they are going to love them as much as I do!

Let me know if you have any questions or need help making these.

edited to add: I've had such a great response to making these I've decided to sell them in my Etsy Shop. Check them out here if you're interested.

Linking Up With:

{Handmade Holiday} Monogramed Christmas Shirts

I knew this year I really wanted to make all the gifts we'd be giving to family. I've been having a lot of fun making all these gifts, they are so personal and special to me because I've made each and every one. I really hope they love them too.

This is the first Christmas in three years that we'll be at home with my side of the family. I really wanted all my nieces, nephew and Ava to wear some sort of coordinating outfit, because yes I am that Aunt and Mother who thinks it's cute to match and coordinate with your cousins!

I decided to make them each their own monogrammed shirt to wear on Christmas day! Here's what I did;

What you'll need: {most of this can be found at your local craft store, and use a coupon for more savings.}
-blank shirts in any color {I choose red & white and mine are from Wal-Mart, by far the cheapest I've found them at about $4 a piece.}
- heat bond
- felt in any color for as many monograms as you need
- sewing machine & thread
- Christmas fabric
- needle and embroidery thread {in coordinating colors}

Here's what you'll do; {these pics were all taken on my iphone, turns out it's hard to man a camera and sew! :)

I choose to do a circle design, and then sew a monogram on top. I traced out 4 circles in the same size for my 4 shirts, and then used the heat bond to "bond" the fabric to the shirt. It helps me for when I sew the fabric so it doesn't slip around, and will also acts an an extra "glue" so it all stays together.

Photobucket


After that I sewed all 4 of them around the edges of the circle.

Photobucket

Here's what they all looked like after I sewed on the fabric circles.

Photobucket

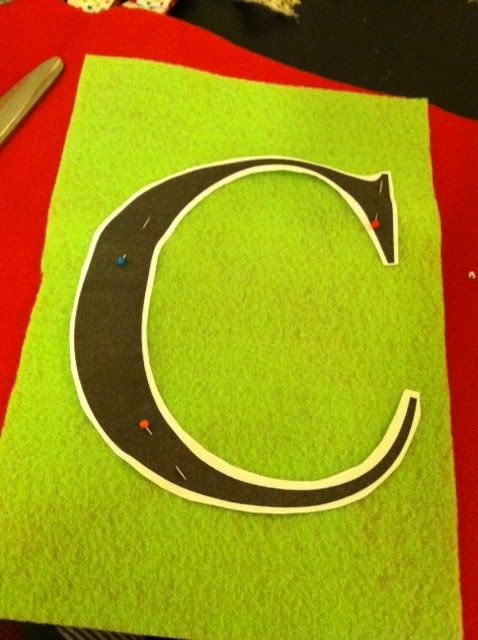
Next it was time to do the monograms. I picked out a font I liked and printed all the initals out on paper and then pinned them to the felt and cut out the letters. I tried to free hand them but they were a mess, so this was much better for me and they look prettier.

Photobucket

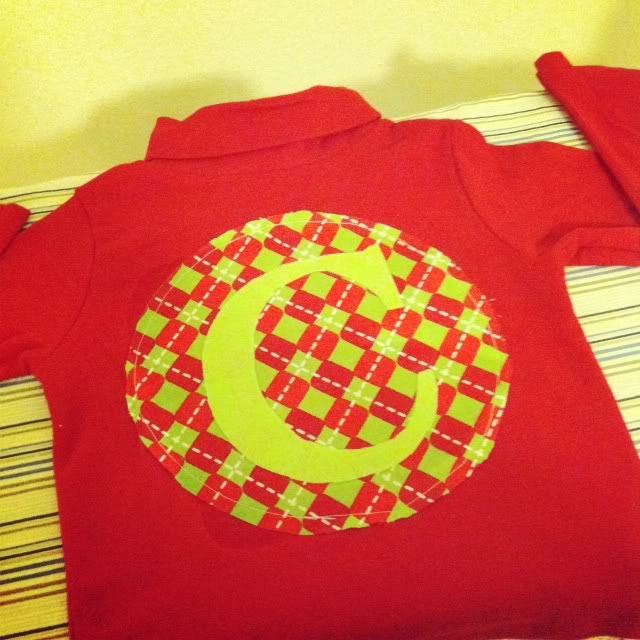
Next, I used the same method and used heat bond {follow the directions on the package} and fused them to the fabric circles.

Photobucket

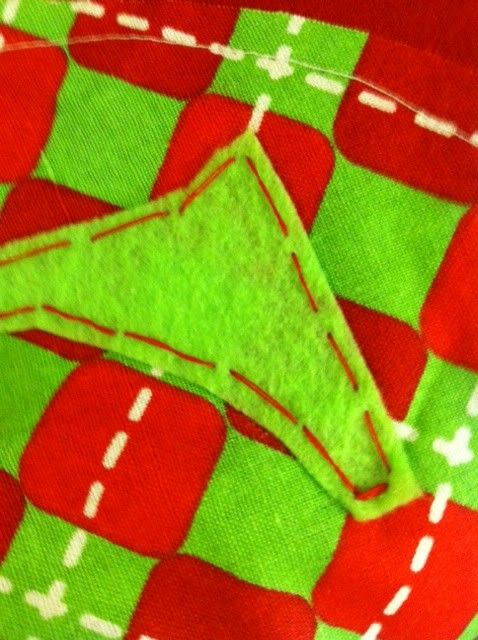
After that, I wanted a contrasting color around the monograms so I used embroidery thread and hand stitched around the monograms. You could also use your sewing machine and so it that way to, but this is what I choose to do. {pop on a movie and do this while you watch since it might take a while depending on how many shirts your doing!}

Photobucket

Then when you're all done they will look like this:

Photobucket

Box them up and give them to the kiddos! I can't wait to see them all in their shirts Christmas day!

December 13, 2011

{Handmade Holiday} Easy DIY Gift Packaging

I've been making handmade gifts all season long, and for some of them I needed some small boxes to wrap them up in. So instead of buying ones I used what was already in my home in a creative way. This is an easy DIY method that you could repeat many ways for different occasions not just Christmas.

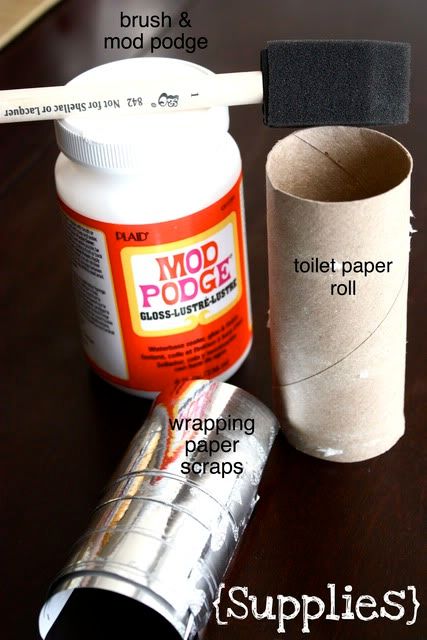
Here's what I used:

Photobucket

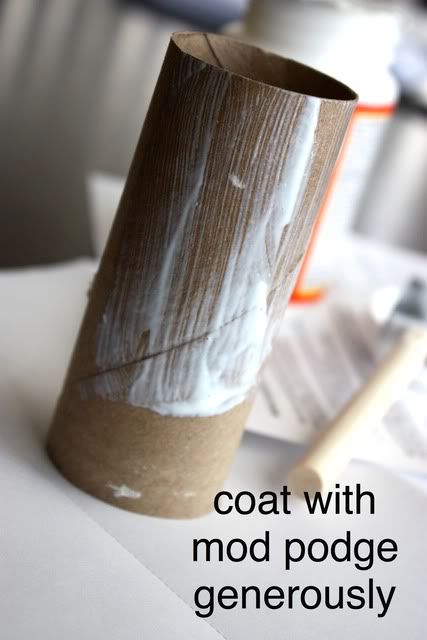
You could also use left over paper towel rolls and just cut them to size. Also you can use different paper too like scrapbook paper, newspaper or any kind of paper really. Remember this is just a method so you could switch out the ribbon and paper as you see fit for your gifts.

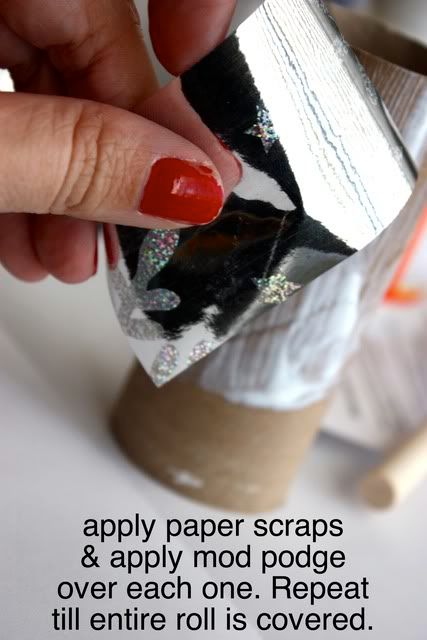
Here's what I did next:

Photobucket

Photobucket

Pretty simple and easy right?!! Let it dry completely. After its done drying fold one end in and then fold the other end over it, repeat on the other end of the roll to seal your gifts inside. It will end up looking like this, after you've tied an pretty ribbon around it of coarse!

Photobucket

An easy gift packaging option that I think is really simple and cute too!

What ways are you packaging up your gifts this year? Pretty paper, ribbons and bows?

Tell me about it below!

Linking Up this project with:
A Bowl Full of Lemons * My Uncommon Slice of Suburbia * Get Your Craft On
Thirty Handmade Days * Sundae Scoop * Weekend Wrap Up Party

On a complete side note; Our Dwell Studio Bedding is for sale. I'd be willing to ship it anywhere if you're interested. see the Craigslist posting here.

LinkWithin

Related Posts Plugin for WordPress, Blogger...